|
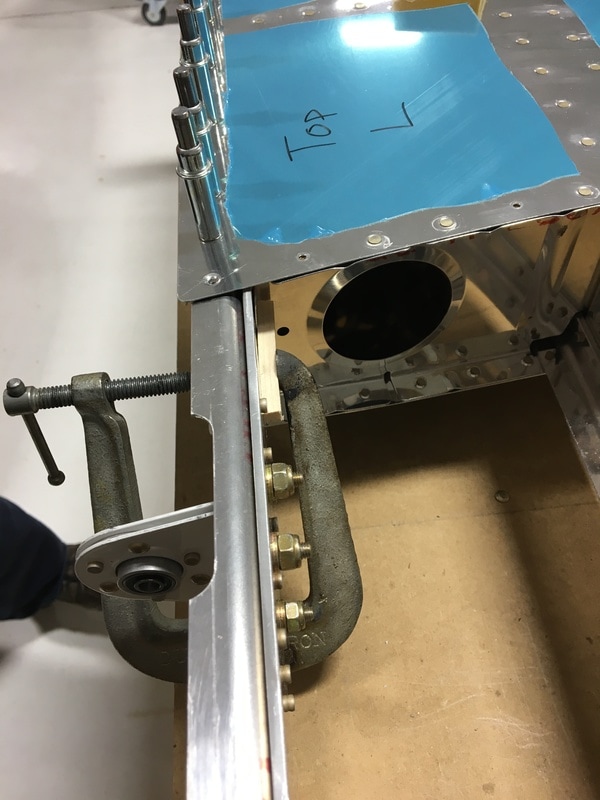
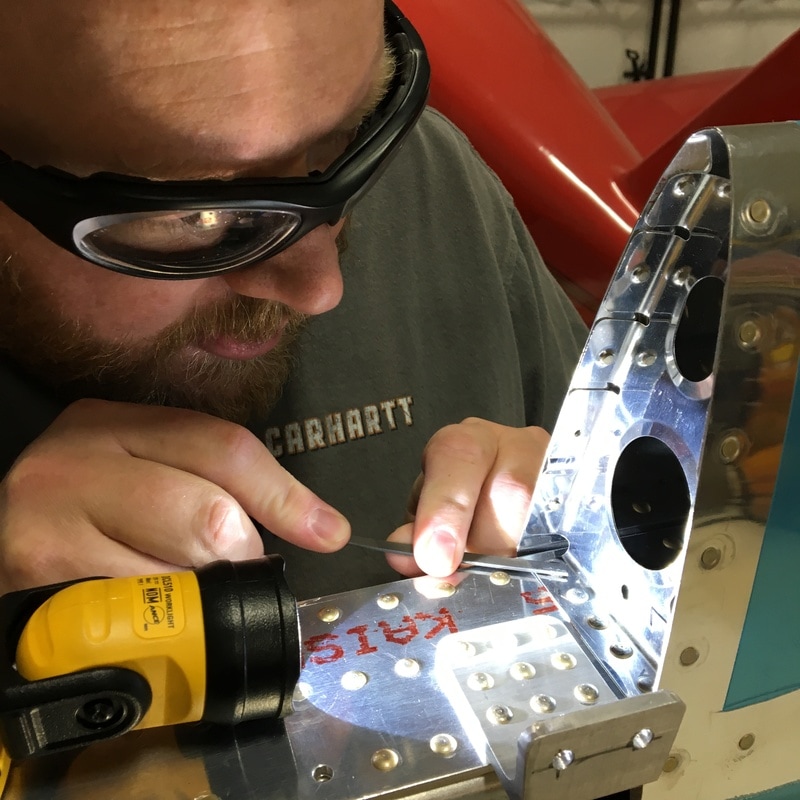
We have (finally) reached the point where we can attach the rear spar to the horizontal stabilizer. It's been a long, long, long, road to this point. If you had told me that we would spend 10 months working on this part of the plane, I would have never believed it. We only have two steps left before we can officially declare this part of the build finished 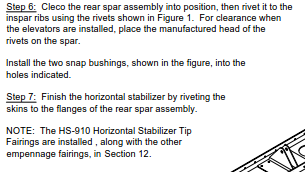 ...and we have to fix that terrible rivet I showed you last week. We decided to wait awhile before we tackled our riveting mistake. We needed time to contemplate our options and maybe ask for a little advice from some more experienced builders. In the meantime, we started attaching the rear spar to the ribs using pop rivets. Once the rear spar is in place you can only access it from one side, so pop rivets are the only option. The nice part about pop rivets is that they are pretty hard to mess up. Don't get me wrong, you can definitely mess them up, but there are fewer ways that they can go horribly wrong. The worst part of this step was that we had to ream almost every single hole before we could set the rivet. The six rivets that are in the center of the horizontal stabilizer are accessible from both sides, so we used regular rivets in that location. When we squeezed the very first rivet, we didn't notice that the rib flange was pulled away from the spar. You could see the rivet bulge between the flange and the spar, so it had to come out. We went about that in the regular way - drilling out the head of the rivet and then using a punch and hammer to drive out the shaft. That's when things went wrong. As we (should) have learned many times, a small mistake can turn into a much bigger mistake very quickly. When we tried to hammer out the rivet shaft, this is what happened to the flange. 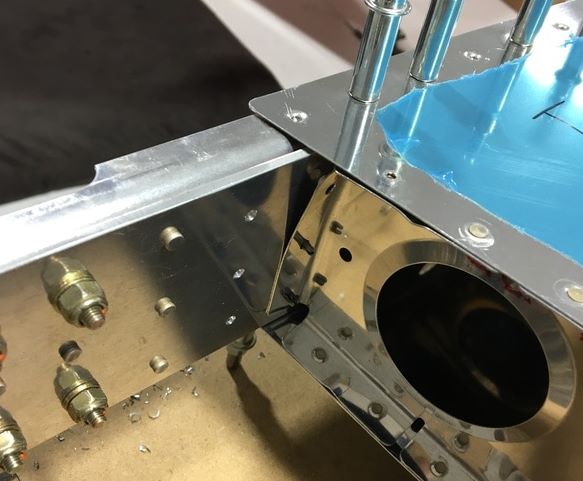 Oops! As we hammered out the shaft, the bulge in the rivet got stuck on the flange. As the rivet moved, it pulled the flange with it. At this point, our only option is to fix mistakes as best we can, so we tried to bend the flange back to it's original location. First, we put two flat dies in the squeezer and tried to flatten things out by squishing the flange back into place. 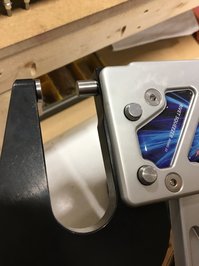 That helped a little bit, mostly to flatten the area right around the rivet hole. Next, we tried to use clamp to push things back together. 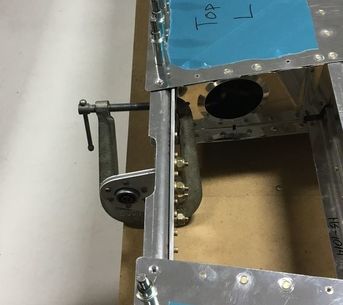 I may have mentioned once or twice (or a hundred times) that there isn't much room to work in this area, so we had to find a small enough clamp to fit. The clamp helped straighten things out, but it left quite a few scratches on the flange and spar. There was no way to bend the flange back to exactly where it should be, so we decided we would have to use the clamp to hold things in place while we replaced the rivet. We used some tiny pieces of scrap wood to protect the aluminum from the clamp. This is the end result of all that work (after we installed the other two rivets). 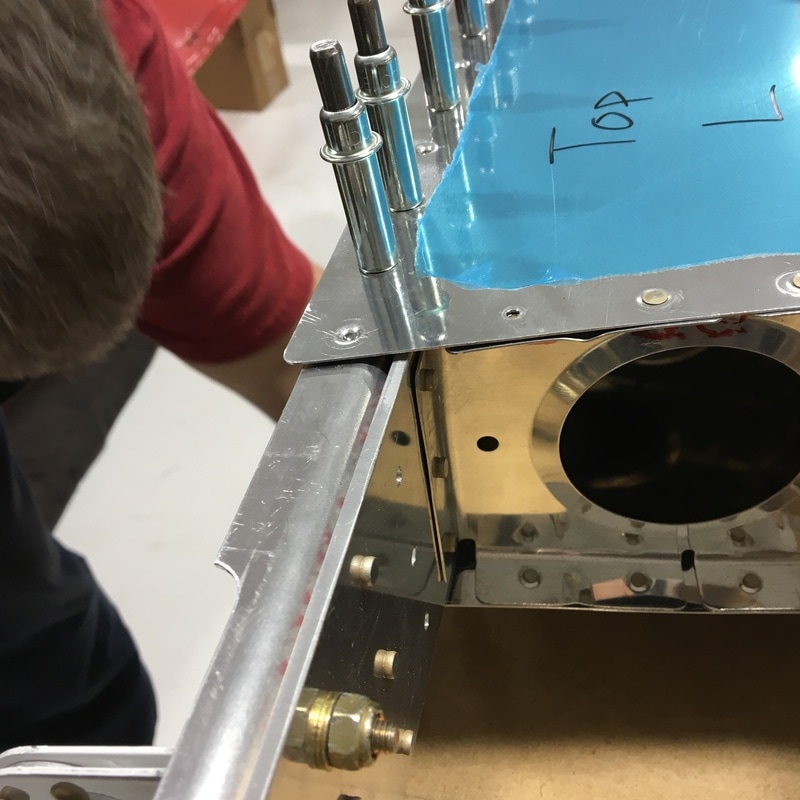 Honestly, I'm not sure that it looks much better than it did originally. Mike says that the final product is better and after all the trouble we went through, I'm going not going to argue. The final step was to attach the rear spar to the skin. It was probably the easiest thing we've done on the plane in months. Not a single thing went wrong and Mike actually finished half of the rivets on his own while I was at work last weekend. He could have easily finished all of the rivets but (wisely) waited for me so we could finish it together. 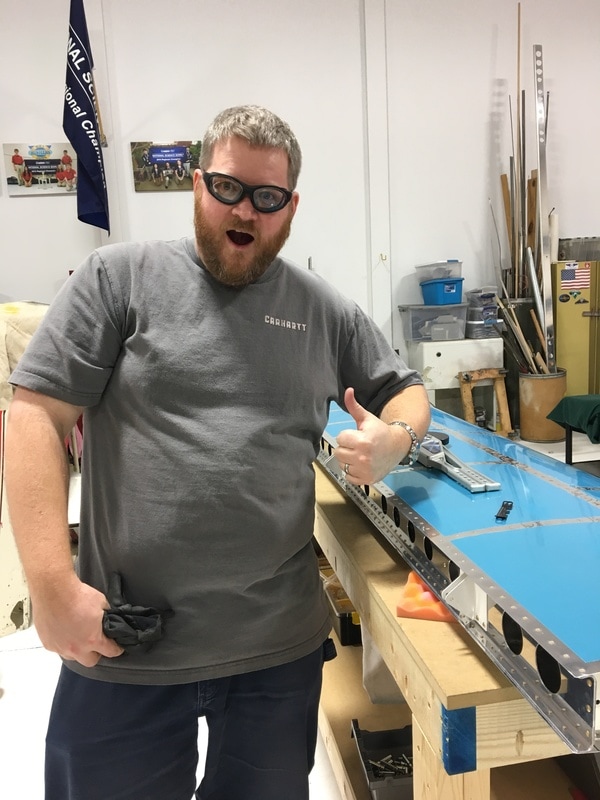 Normally, this would have been the point where we declare victory, but we still had that one rivet to replace. Remember, it looks like this... 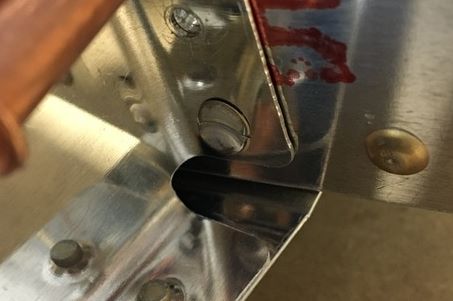 We've spent the last two weeks debating how to remove this rivet. The manufactured head is so deformed that we couldn't tell where the center was. Mike posted this photo on a builder's forum that he frequents and asked for advice. People suggested that we drill though the shop head on the other side since it is in good shape. We considered that option, but decided against it because even if we removed the shop head, there's no room for a hammer and punch to remove the rest of the rivet. Finally, we decided to very carefully perform airplane surgery and attempt to remove the mangled manufactured head. Mike wanted to get a better look at what we were working on, so we put the horizontal stabilizer back into the wooden cradles, upside down. 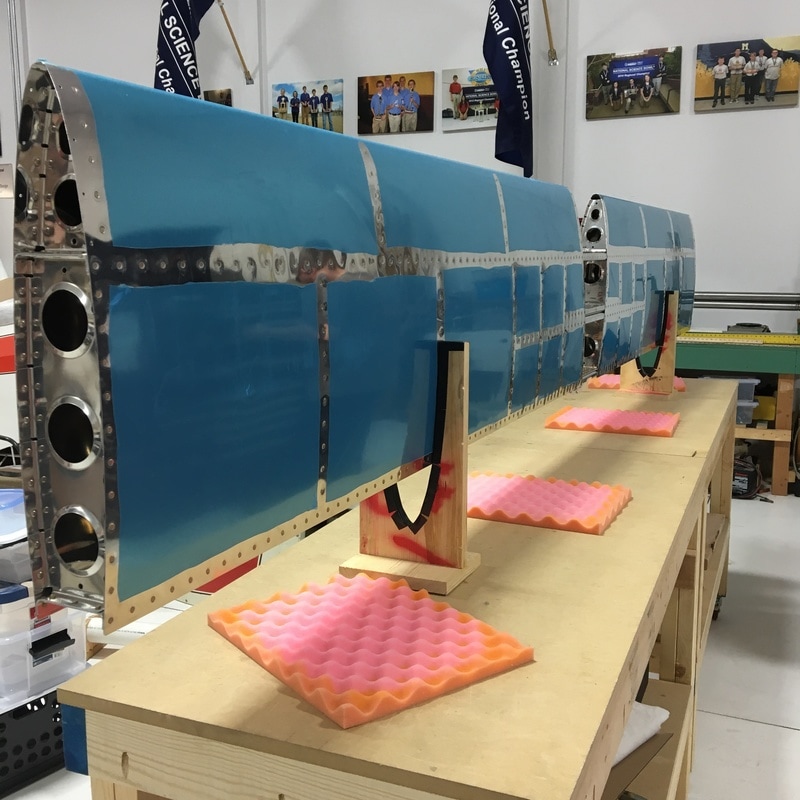 Mike used calipers to measure the distance between the center of two rivets (on the side we didn't mess up) and we used that measurement to try to determine where to find the center of the mangled rivet. Then, he used a tiny metal file to try to flatten out the head near the center. While Mike worked, I hovered, took pictures, and tried to act as the voice of panic/reason. After a while, we laid the horizontal stabilizer on it's side again and Mike used a punch to make a divot where we thought the center of the rivet would be. We used the shortest, smallest drill bit we had (which only fits in the angle drill) and attempted to drill out the center of the head. Then he carefully used a hammer and punch to break off the least mangled half of the head. After half an hour of work, this is what we removed. 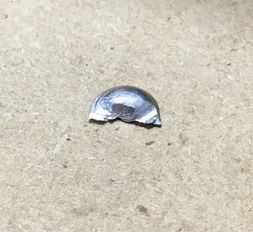 And this is what was left. 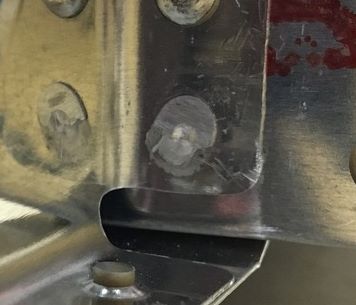 We still couldn't tell where the center of the rivet was, so we had to keep working on it. I'm typically more patient that Mike when it comes to fiddly work, so I spent 20 minutes very carefully filing away at the remaining head.  The only evidence of progress I had was a slowly growing pile of tiny metal shavings. Eventually, I had removed enough metal that I was able to slide a razor blade behind the thinnest part of the remaining head, bend it forward and pull it off with pliers. We decided that we couldn't file away any more metal without damaging the flange, and while it was still impossible to tell where the center of the rivet was, we were able to make an educated guess. Technically, you only have to remove the manufactured head before you can punch out the shaft and shop head. Since we didn't know where the center of the rivet was, we used a smaller punch than usual. The idea was that even if we weren't dead center, we would be less likely to punch a hole through the flange while we hammered out the rest of the rivet. Using a smaller punch didn't work out quite as we had planned. 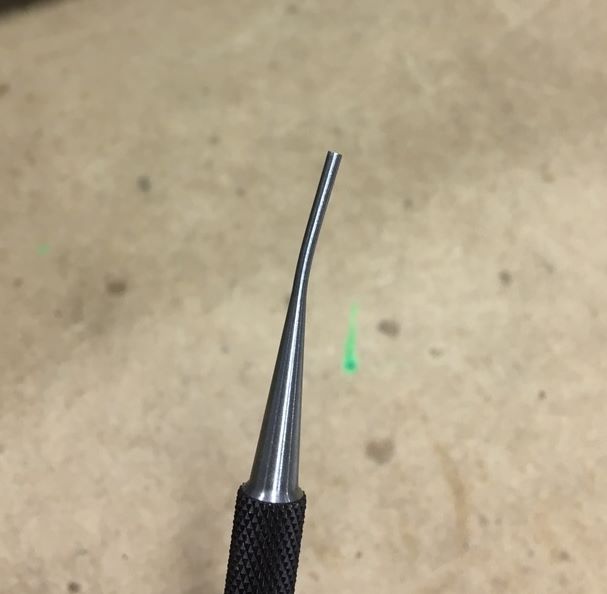 The punch bent and the rivet didn't move at all. We decided that we would have to be brave and attempt to drill out some more of the rivet. Luckily, we actually managed to hit the center of the rivet and were finally able to get the rest of the rivet out. It didn't look to pretty by the time we were done. 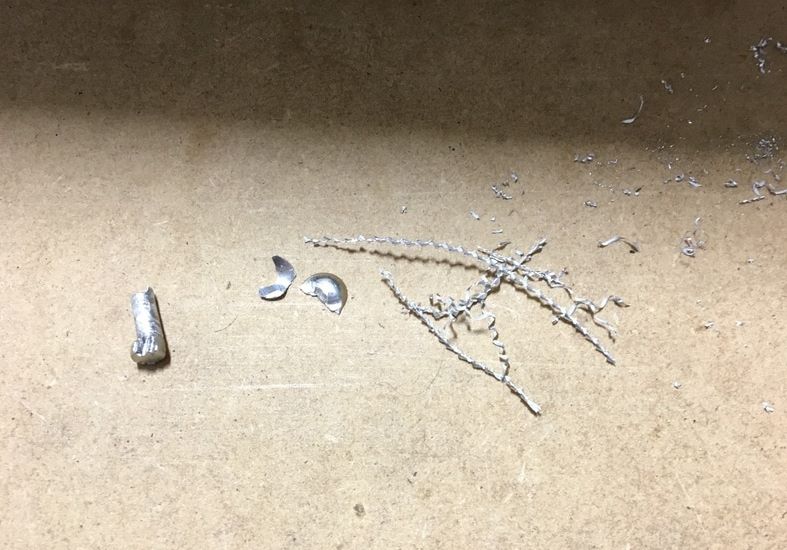 After our previous attempt to remove a rivet from this part of the plane, we weren't too surprised when the flange bent as we removed the rivet. Just like last time, we used a clamp to straighten things out as much as possible. Then we used a small piece of rubber hose over the shaft of the rivet so I could keep the flange in place we installed the new rivet. It actually looked pretty good by the time we were finished. We are definitely getting better at fixing our mistakes. 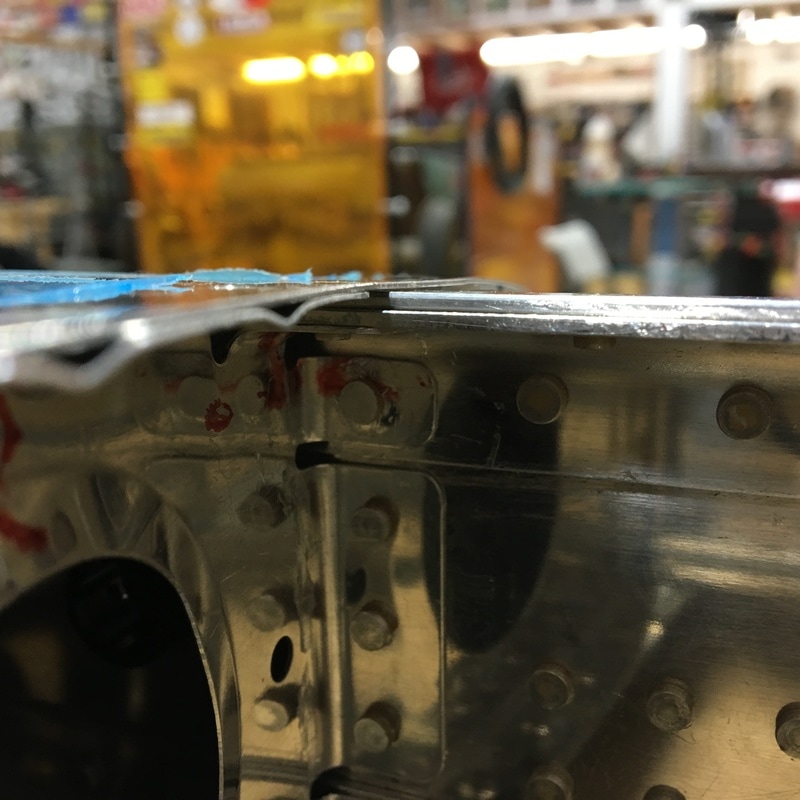 After all that work, we triumphantly declared ourselves finished with the horizontal stabilizer! We now have 2/5 of an airplane tale! 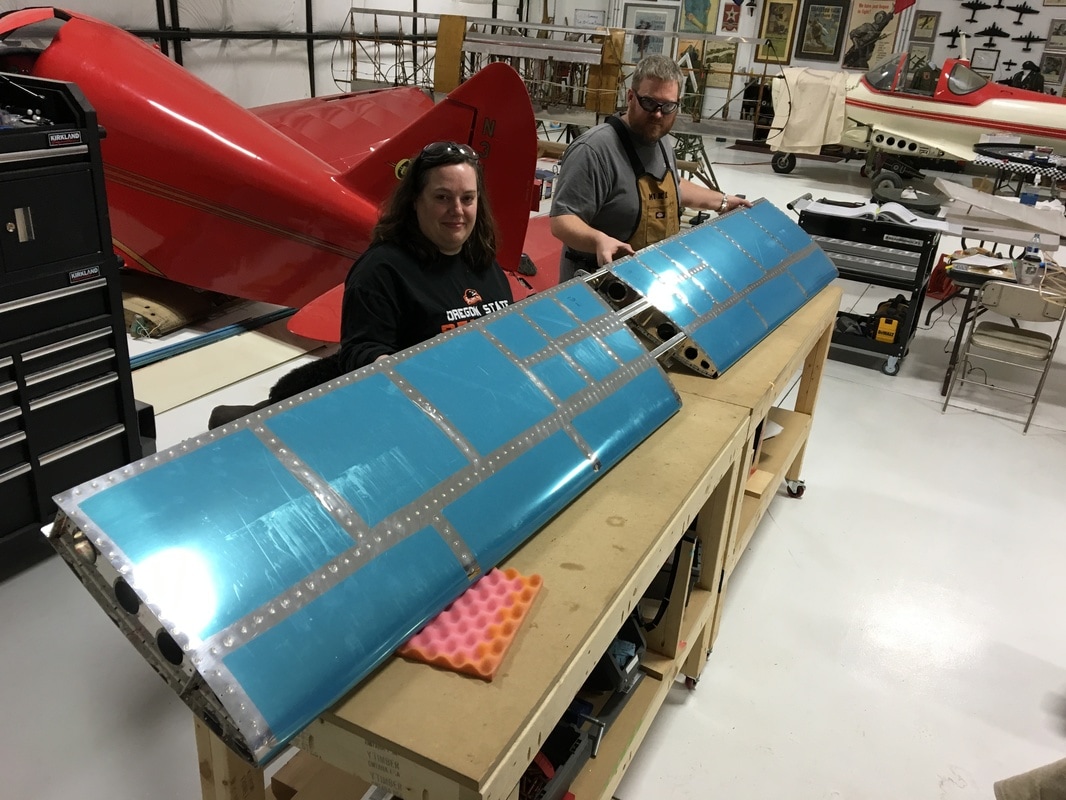
1 Comment
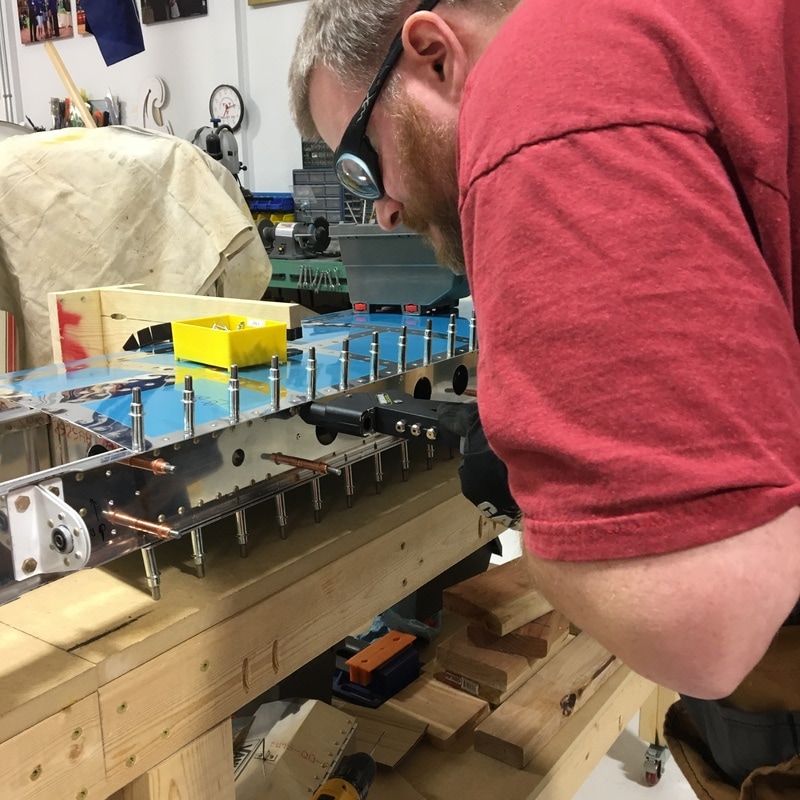
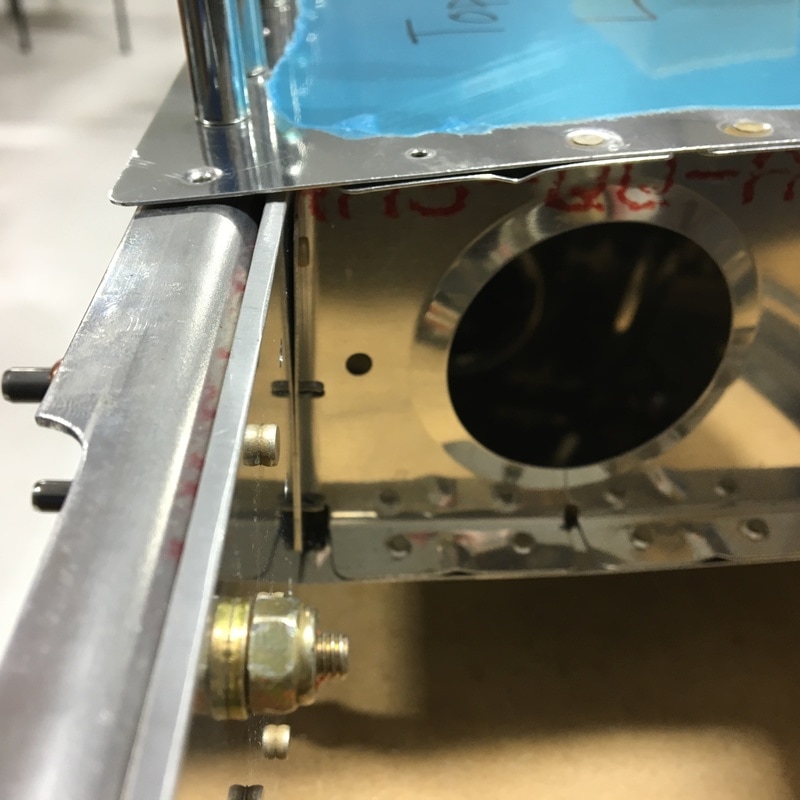
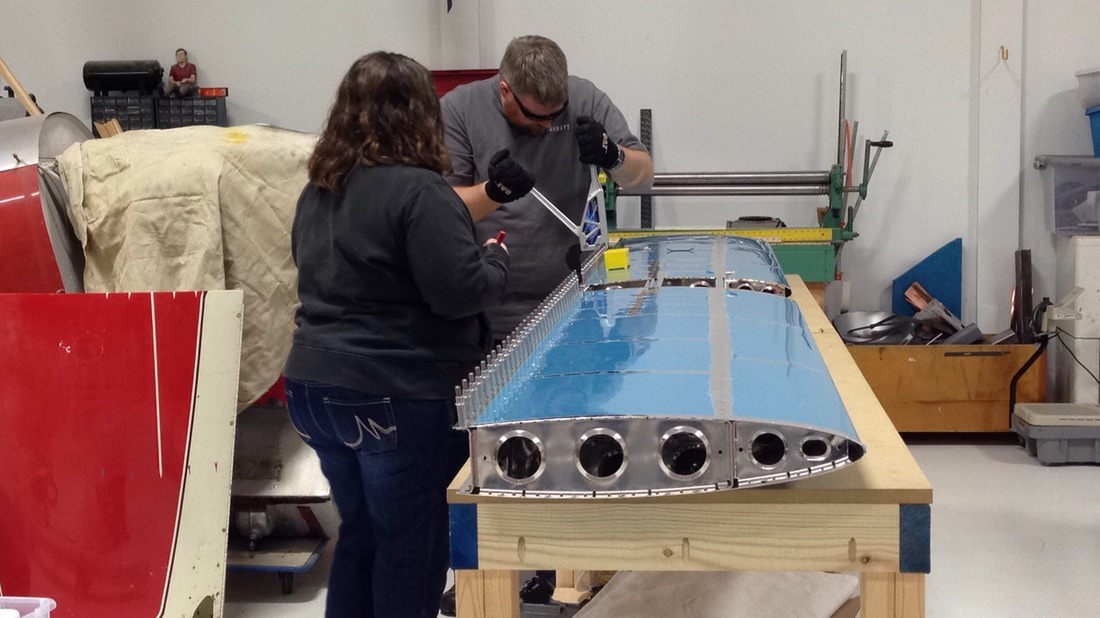
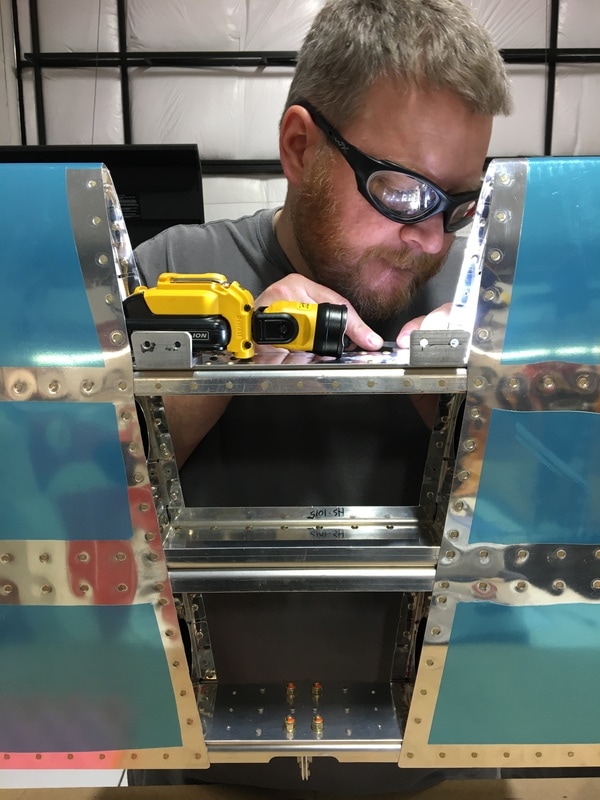
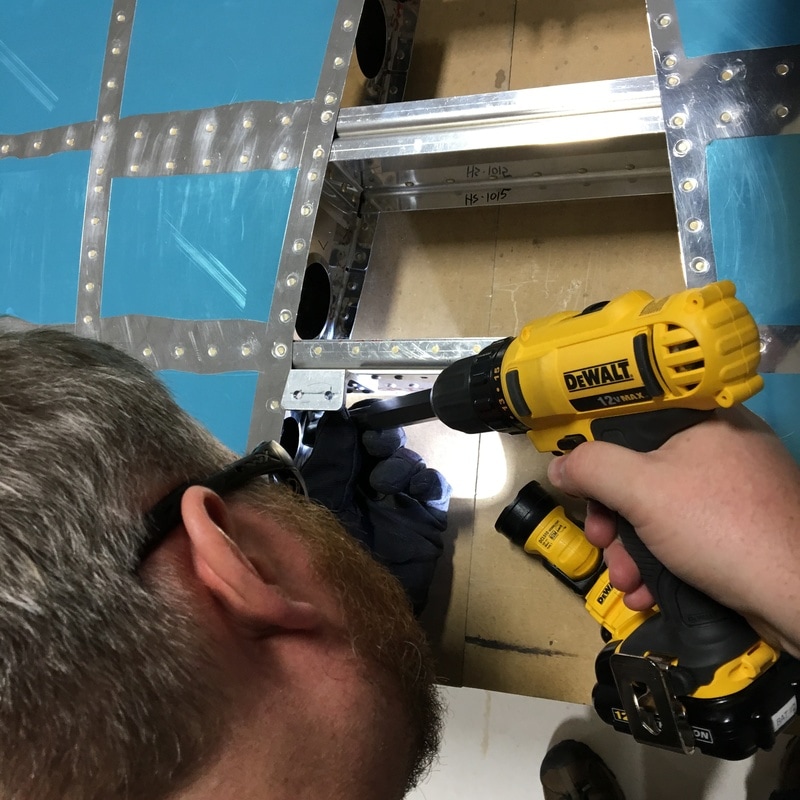
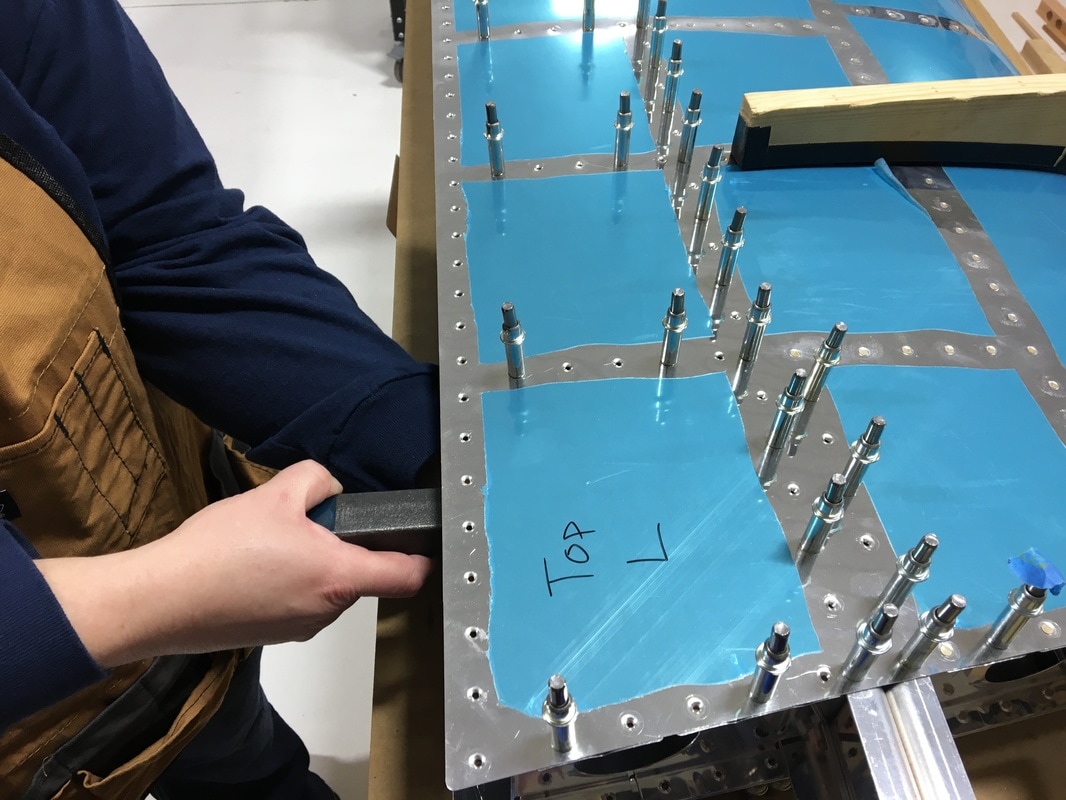
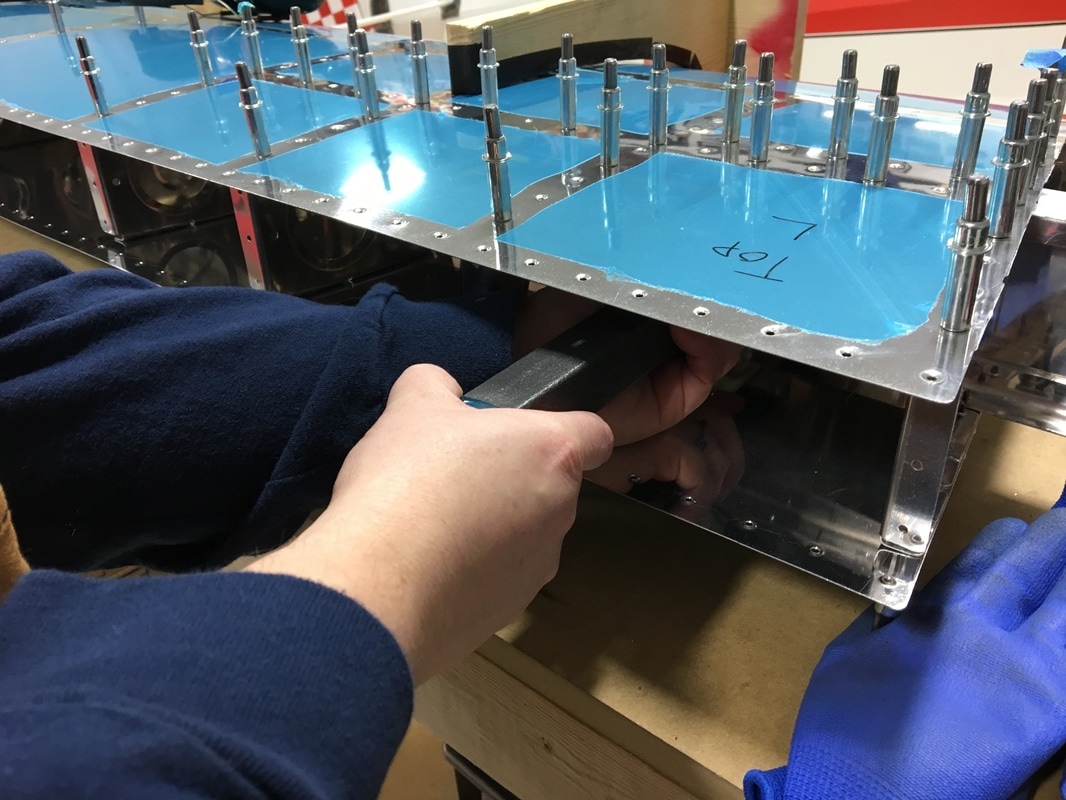
I was right, it took us 3 work sessions to finish riveting the ribs to the skin. I continued to use the long, steel bucking bar and it worked great! Everything went very smoothly, it just took time. Here we are one quarter done: 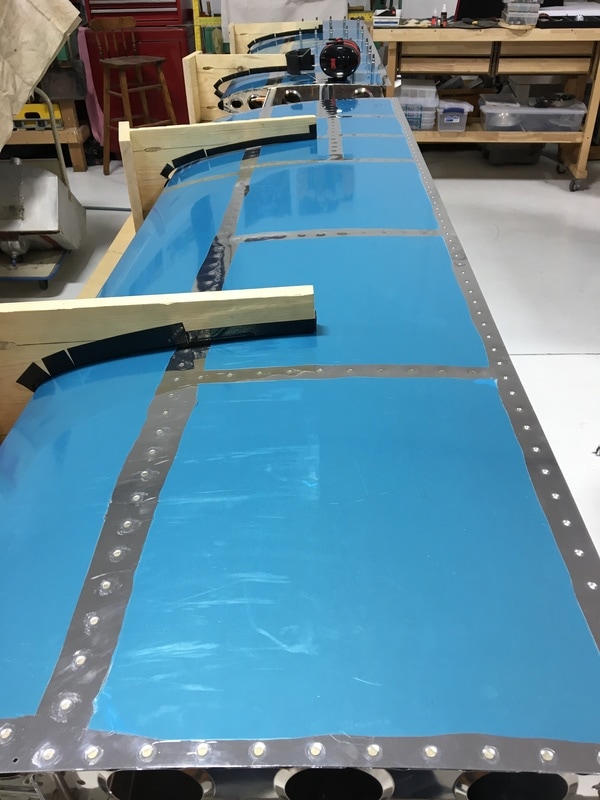 And here is one side completely finished and without rivets! 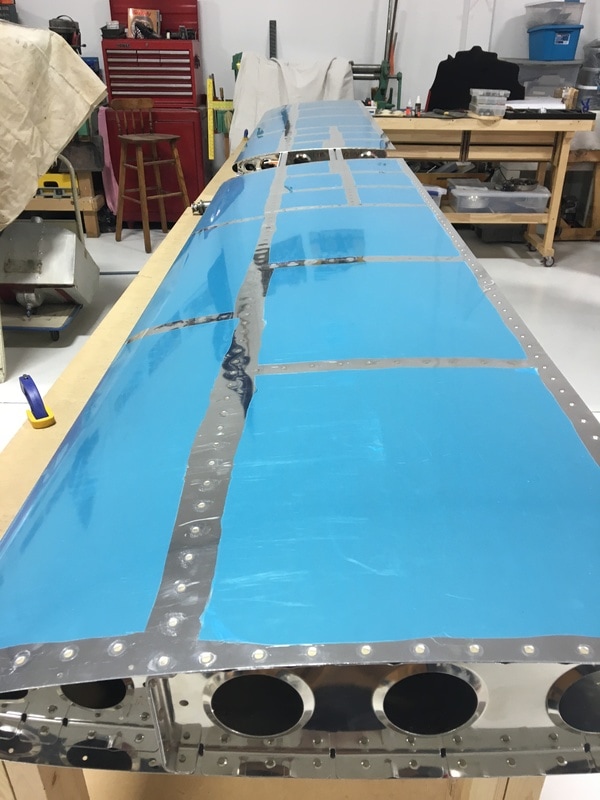 That probably doesn't seem very exciting, but the last time there were no rivets in the skin was when we first put the skeleton and skin together in August. We were also able to remove the wooden cradles we created back in June. It was really nice not to have to deal with the cradles because they tend to slide around on the bench. We used some small pieces of foam between the horizontal stabilizer and the workbench to cushion everything. The bad part about losing the cradles was that it lowered everything by a couple of inches, which meant I had to bend down farther when we were riveting. You wouldn't think that a couple of inches would make much difference, but it was a lot harder on my back and neck. We finally finished riveting the skin to the ribs this morning. Mike decided to show off his best Vanna White moves.  The whole thing is surprisingly light with no clecos in it. Our next task was to go back a few steps and finish riveting a rib to the front spar. When we first worked on this step many months ago, the directions suggested these rivets would be easier to access once the cradles were out of the way.  I'm going to tell you right now, the cradles are not the problem. The problem is that this space is practically inaccessible. Here's what the instruction manual shows... 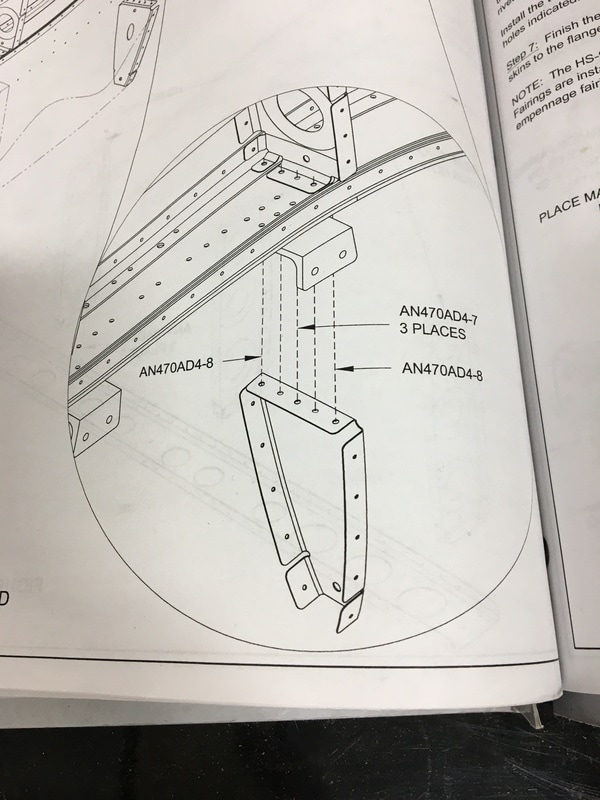 And here is where you're actually trying to work... 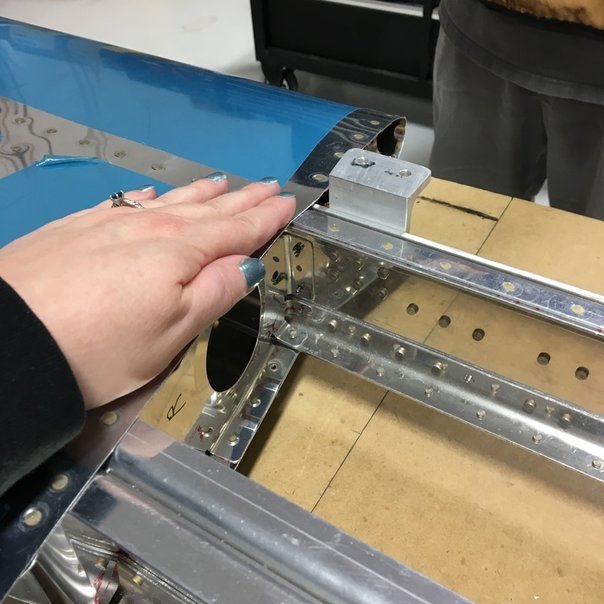 I put my hand in the picture to provide some sort of scale. You can just see the empty holes and ends of the clecos next to my index finger. (The fact that my fingernail polish matches the blue vinyl is a nice bonus.) These rivets are between the two halves of the horizontal stabilizer (right in the middle where the skin doesn't cover) and between the front spar and the horizontal stringers. My hand is pretty small and I estimate there's about six inches between the stringer and the spar. There's practically no room to work in there and because everything is at a funky angle, most of our tools wouldn't reach either. The rivets wouldn't quite fit into the holes, but Mike couldn't use the regular drill bit to ream the holes. The normal bit he uses in this situation is specifically shaped so it won't enlarge the hole, just remove any tiny chips of metal that might be blocking the rivet. Instead, he had to very carefully use a really long, regular drill bit and try not to enlarge the holes . 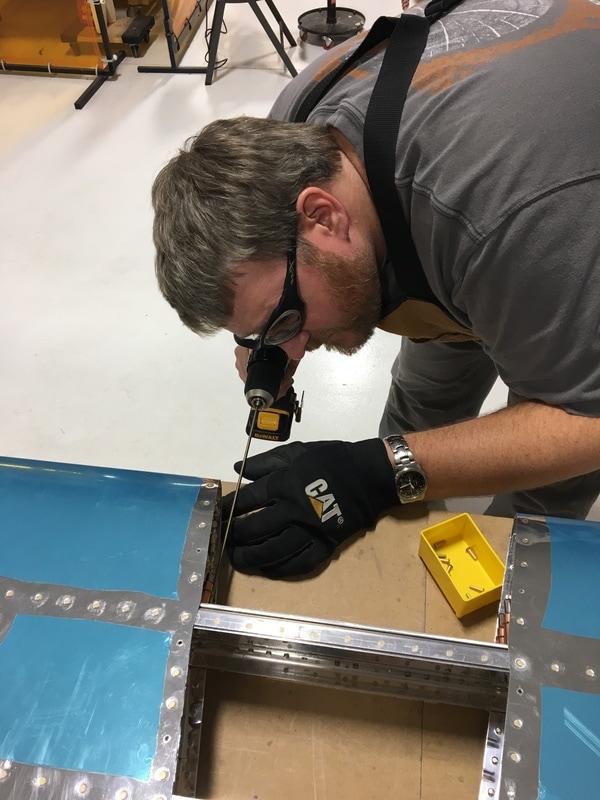 We tried to figure out a way to squeeze those rivets, but there just wasn't enough room. Mike had to use the offset riveter and I had to revert to my tungsten bucking bar because it was the only thing that would fit in that tight space. There are so many other rivets in other pieces in that area so I also had to be careful to not accidentally damage those. To top everything off, we were using size 4-8 rivets, which are bigger in diameter and a lot longer than what we've been using. I didn't take many pictures of us trying to install these rivets, mostly because I was too busy swearing and feeling frustrated. My hands and knuckles got banged around a lot and it took us about 45 minutes to put in 10 rivets. At one point, Mike actually ran the rivet gun and the bucking bar on his own because that was just easier. 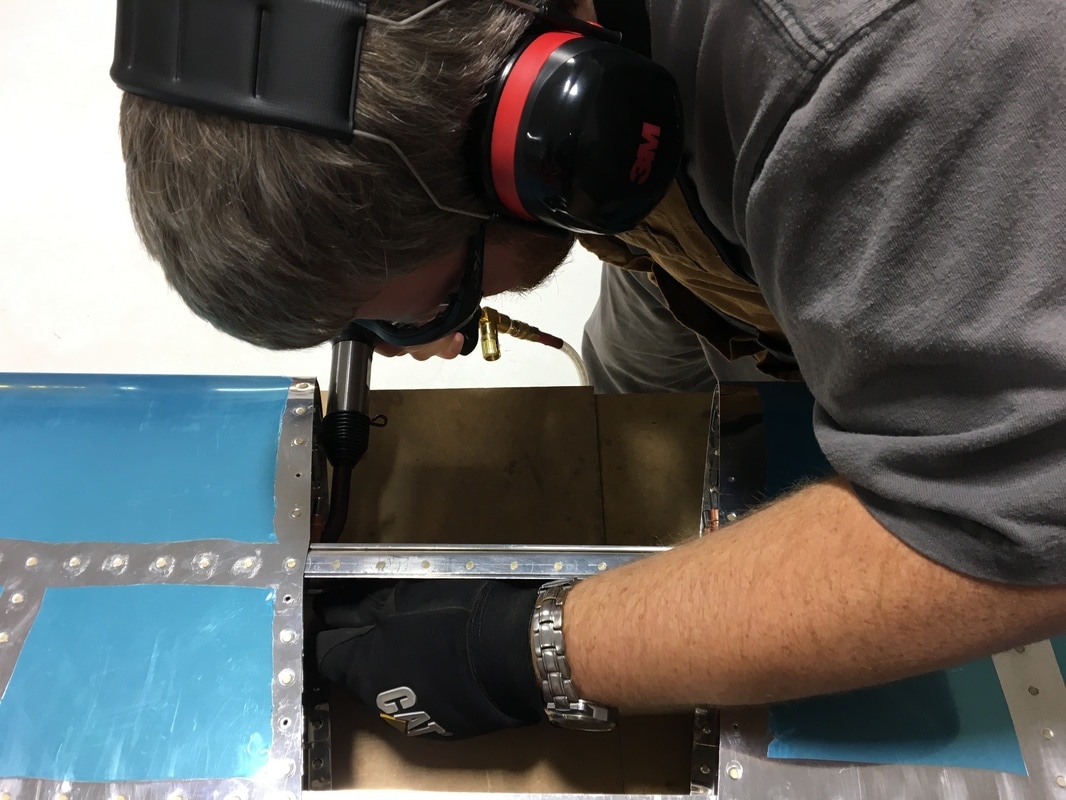 We managed to get it done, but not without one major screw-up. 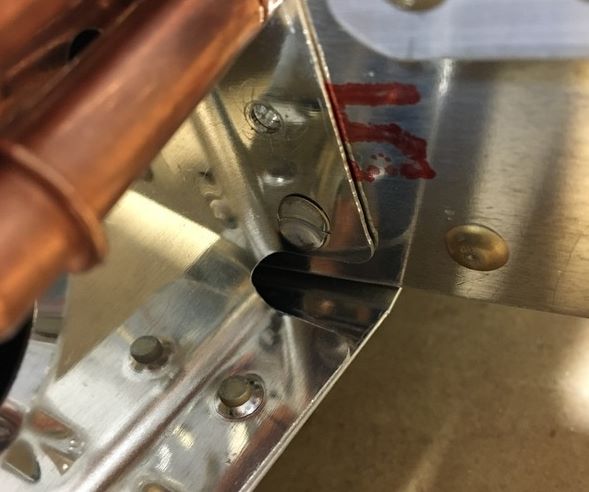 That rivet is definitely a problem. One side is basically pounded completely flat against the rib flange. It will have to come out, but that is not going to be an easy task. Normally we would drill out the rivet head and punch the shaft out the other side. Since we can't really identify the center of the rivet head, that probably won't work. We decided to leave it for now so Mike can think about the best way to get it out of there without doing serious damage. We ended the day by (finally!) clecoing the rear spar into place. We officially have no more loose parts for the horizontal stabilizer!!! We need a few more pop rivets to connect the rear spar to the ribs and then we can rivet the skin to the rear spar. 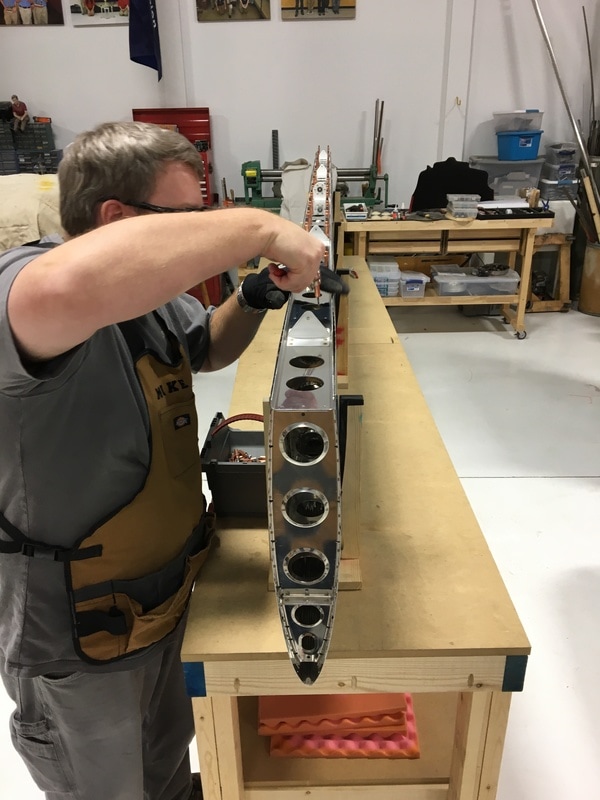 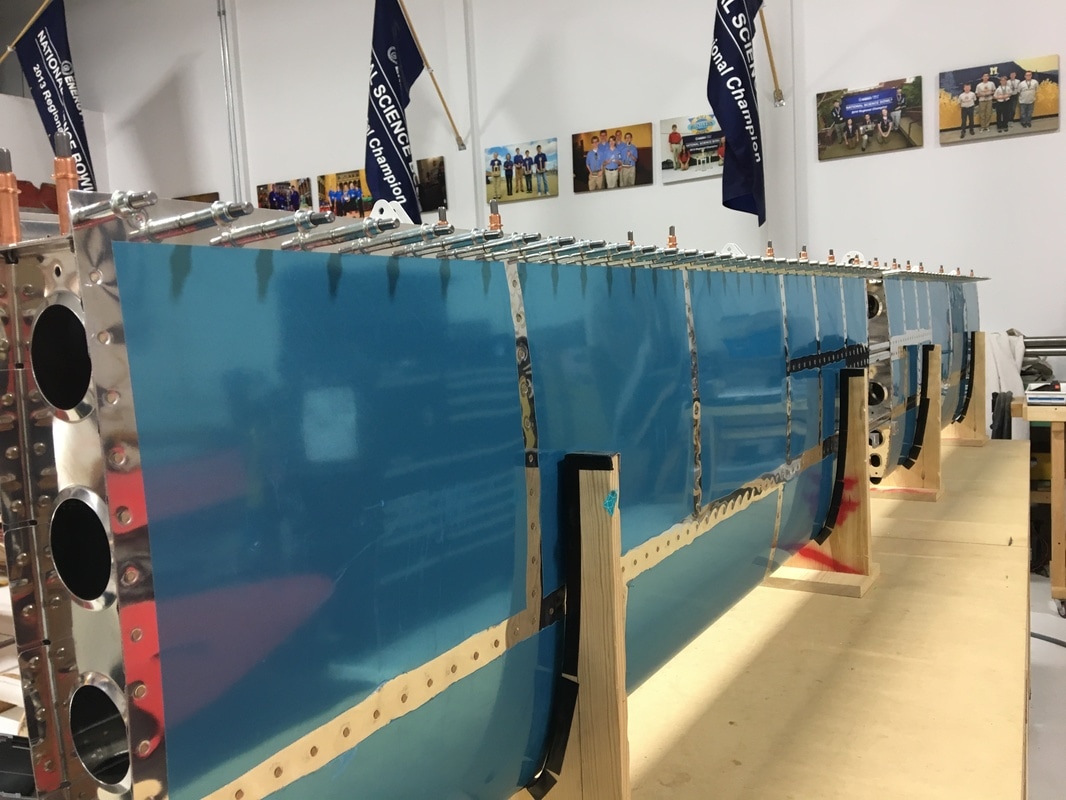 Finally, I hit a very exciting milestone today. I have personally put 100 hours into the build. Mike has put in a lot more solo hours and hit the hundred hour mark months ago. I've been patiently watching as my total hours crept upward and hitting 100 hours feels like a pretty great achievement.
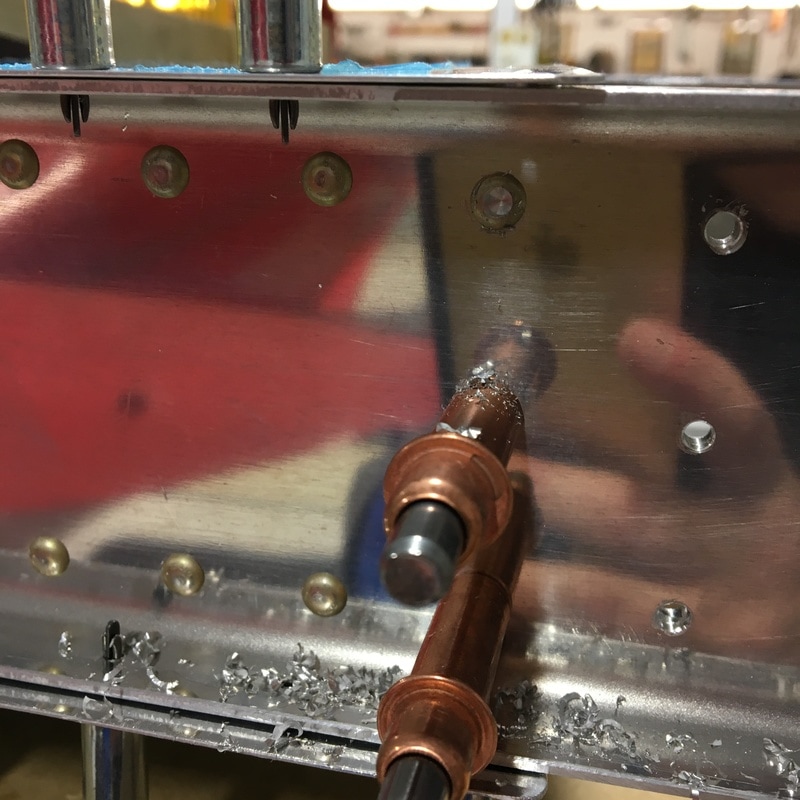
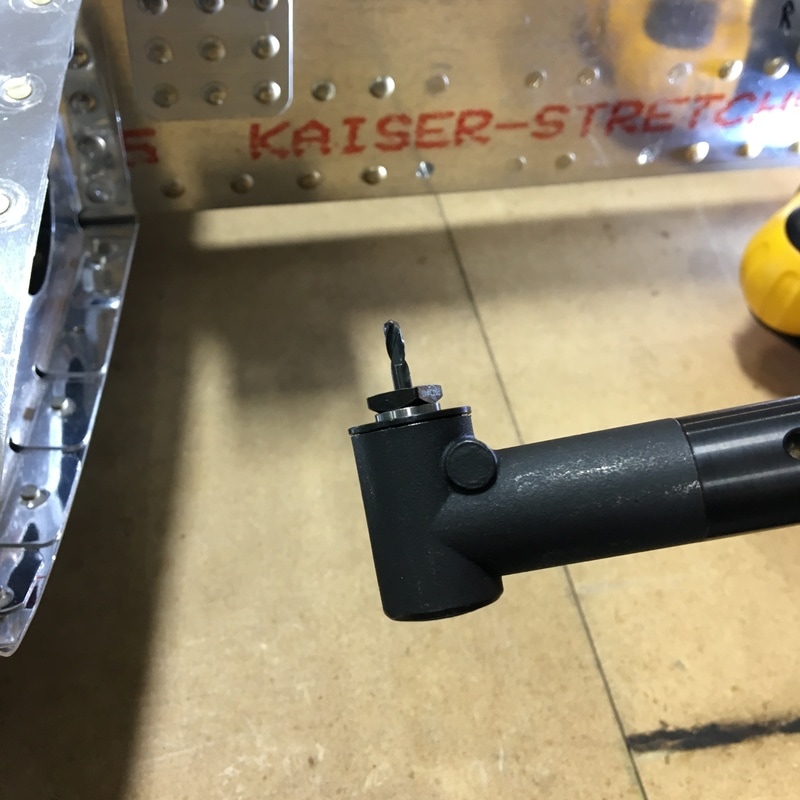
We've officially entered the second year of the build. I think that Mike and I both wish we had made a little more progress over the past year, but it still amazes me to think of everything we've accomplished. Mike also informed me that we've been working on the horizontal stabilizer for 9 months! No wonder it feels like we've been doing this forever. Our work on the plane has been sporadic between the holidays and the winter weather. It's been pretty cold this last month and that hasn't really motivated us to spend time at the hangar. The hangar is heated, but the first 30 minutes up there are pretty chilly. I can wear gloves and a sweathshirt while we work, but my safety gear lives at the hangar is is a chilly 55 degrees when we arrive. I've worked out a system where I put my safety glasses in my pants pocket and wrap my hearing protectors around my bicep. Then they can warm up a little bit while we get set up. We are continuing to refine our workspace at the airport. The biggest challenge we've had to make over the past few months is dealing with dust. A group of middle and high school students are building a Northrop primary glider at the hangar. The whole thing is made out of wood and the sawdust they generate gets on everything. We don't want to seal a bunch of dust into the horizontal stabilizer so we've been covering our workbenches. We started with a cheap plastic drop cloth, but that was quickly filled with holes as (we assume) people pulled back the plastic to check on our work. Once a little hole started, it easily got caught on the hundreds of clecos until the whole things was more hole than plastic. We've graduated to a canvas drop cloth and that has been working better. It also make it look like we're working on something top secret which I kind of enjoy. 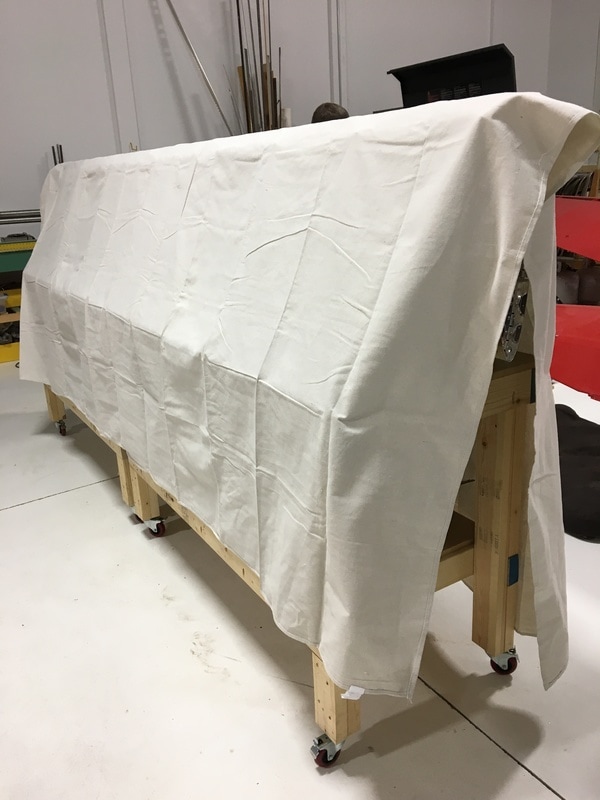 In my last post (over two months ago!) I was complaining about riveting the front spar of the horizontal stabilizer. I estimated that we had about two hours of riveting to go and my estimate was exactly right. We got a roll one day and managed to finish the whole thing in one more session. The remainder of the riveting was uneventful (thank god!) and there was a fair bit of celebrating when we finished. Our next step was to tackle this mess... 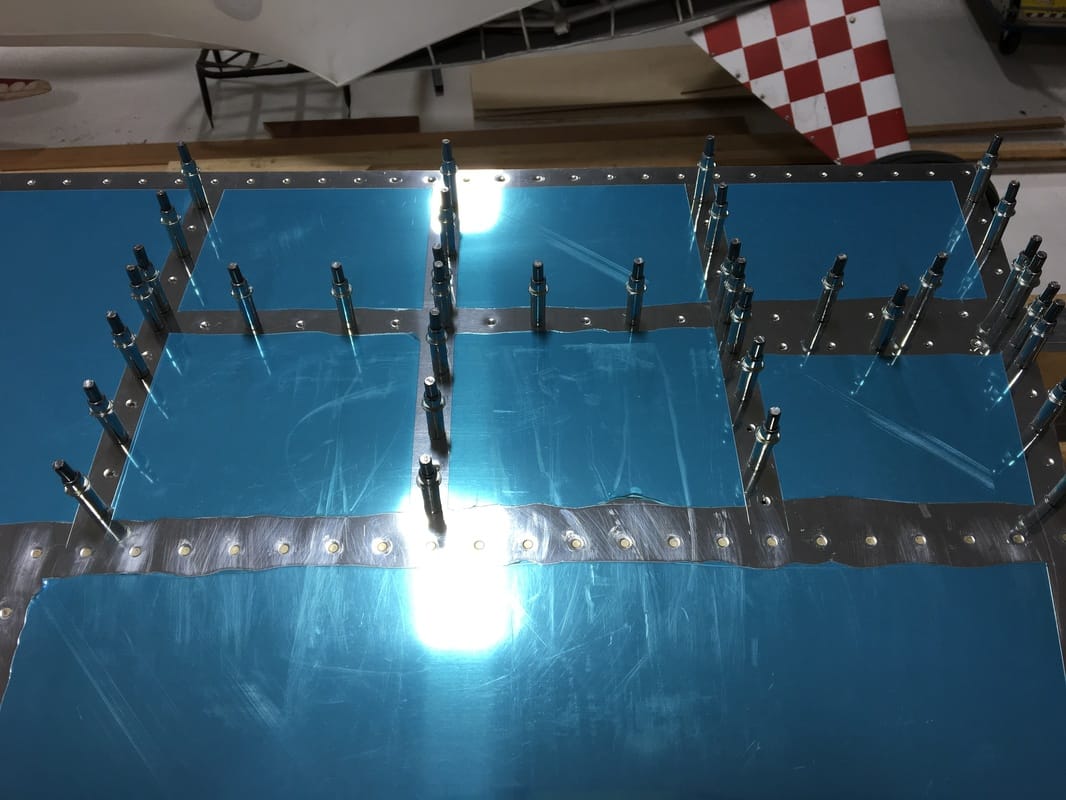 The ribs in this area are interrupted by horizontal stringers that (I assume) reinforce this part of the tail. It's a challenging area to work in because there's not much room for hands and tools in between all those pieces. We started by riveting the lower section of the ribs, below the stringers. The rib that is exposed at the edge was the easiest and we were able to squeeze those rivets. 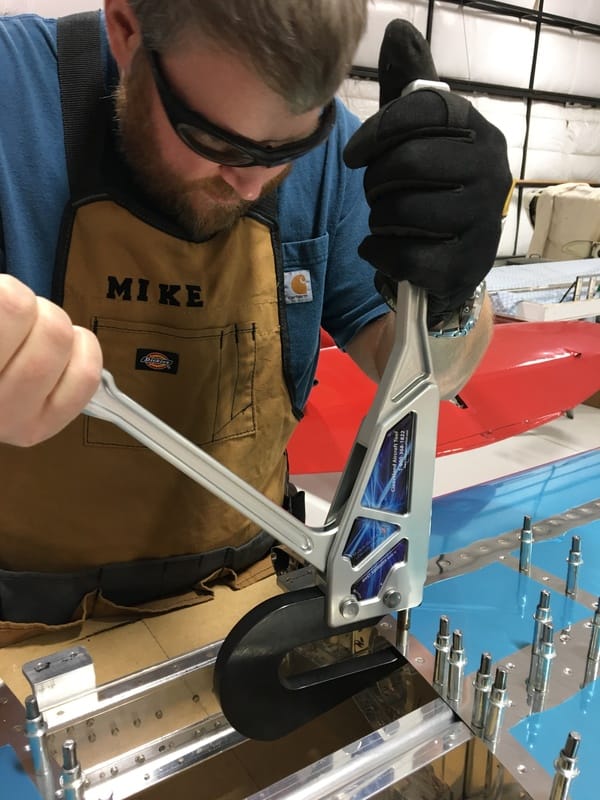 We had to remember to leave a few of the holes open so they can be used for some other purpose down the line. The instructions refer to some sort of horizontal stabilizer fairings. I don't know what a fairing is, but I guess we'll figure it out when we get there. Riveting the ribs behind the stringers was one of the most challenging tasks we've had to do. In addition to the cramped space, I had to be very careful not to damage any of the existing rivets (the rivets that hold the two pieces of the stringer together) with my bucking bar. The stringers also taper at the ends, which caused a problem when my bucking bar slipped. 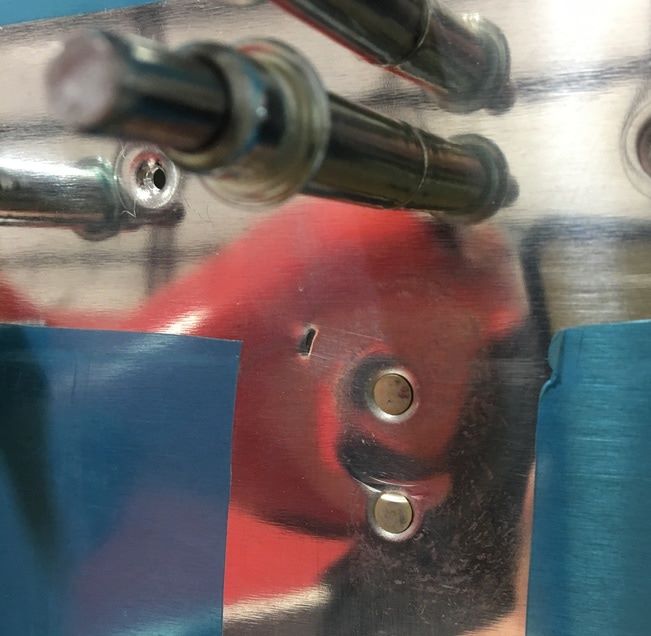 That picture actually make it look much worse than it is...there's not actually a puncture in the skin. We think that at some point my bucking bar bounced and got caught on the very end of the stringer (it's probably only about an 1/8" wide at the very end). Mike was still running the rivet gun and for that second, the rivet gun was hitting the rivet and skin with nothing on the other side. You can see where the rivet below is was bent a little bit on the edge and there's a shallow depression from the gun. The dent (that looks like a puncture) is the very end of the stringer. We decided that we would cause more damage if we tried to fix anything and decided to just let it be. We were more careful after that and didn't have any more mishaps. Our next step was to rivet the stringers to the skin. The stringers are made from two "L" shaped pieces that are riveted together to make "T" shape. There is a row of rivets that runs down each side of the cross stroke that make up the top of the "T". The main stem of the "T" blocks your view of one side. Here, maybe some pictures will help explain this better... 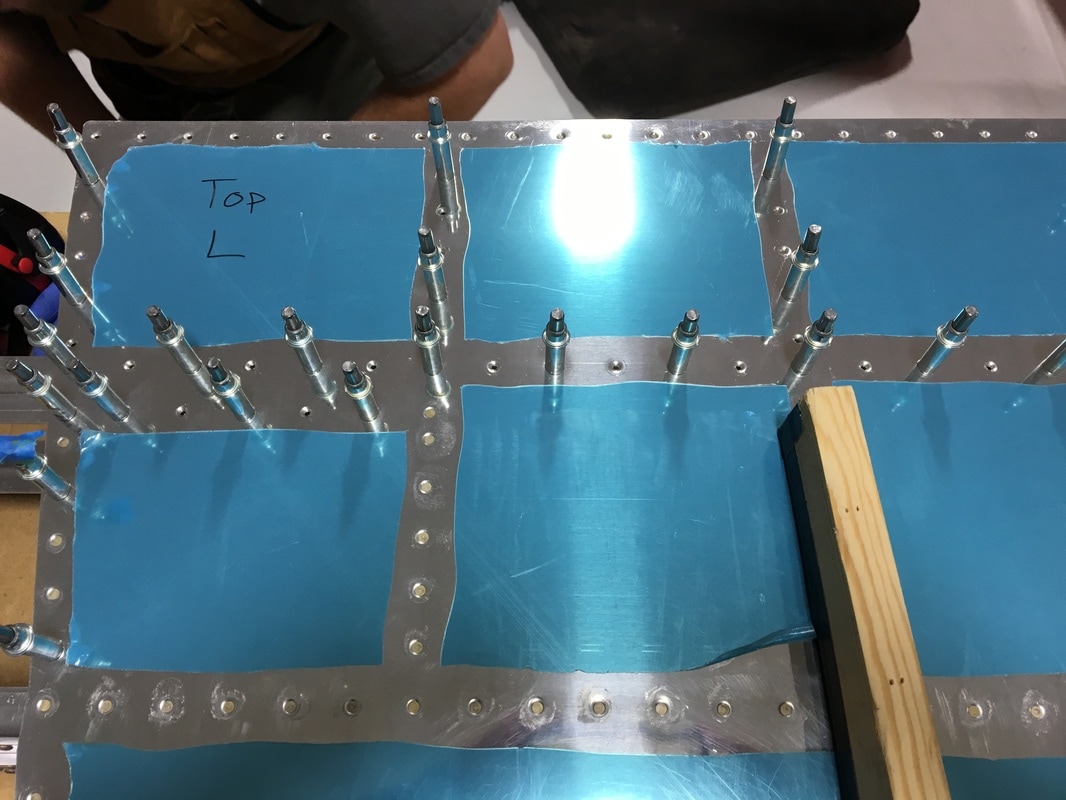 On the left, you can see that there is a double row of horizontal rivets that run between the first and second rib. 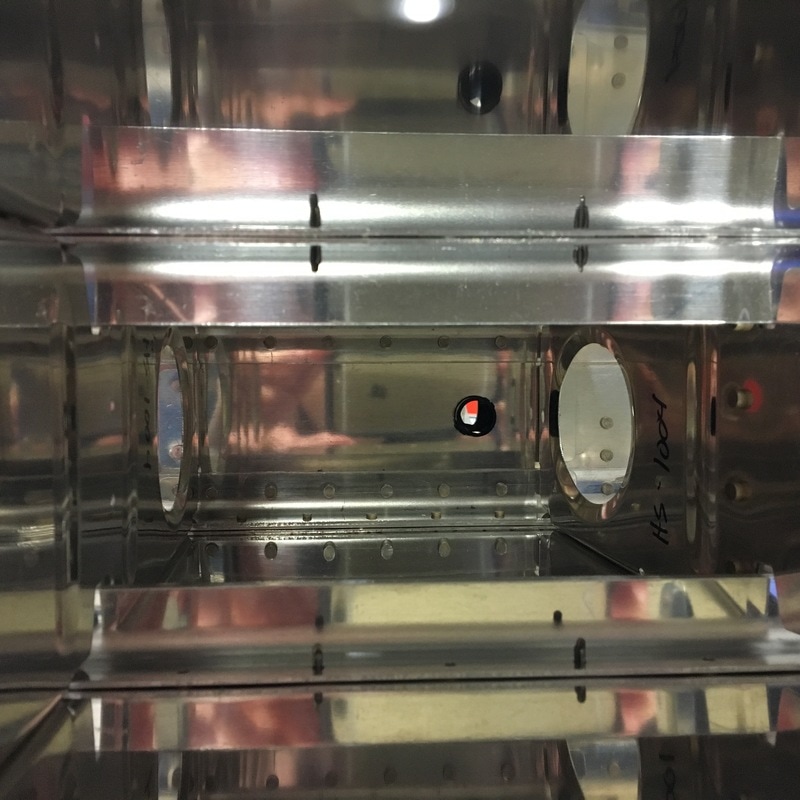 When you look inside, you can only see one row of clecos because the others are hidden on the other side of the stringer. How do you rivet something that you can't see and can't reach? You use a special bucking bar! 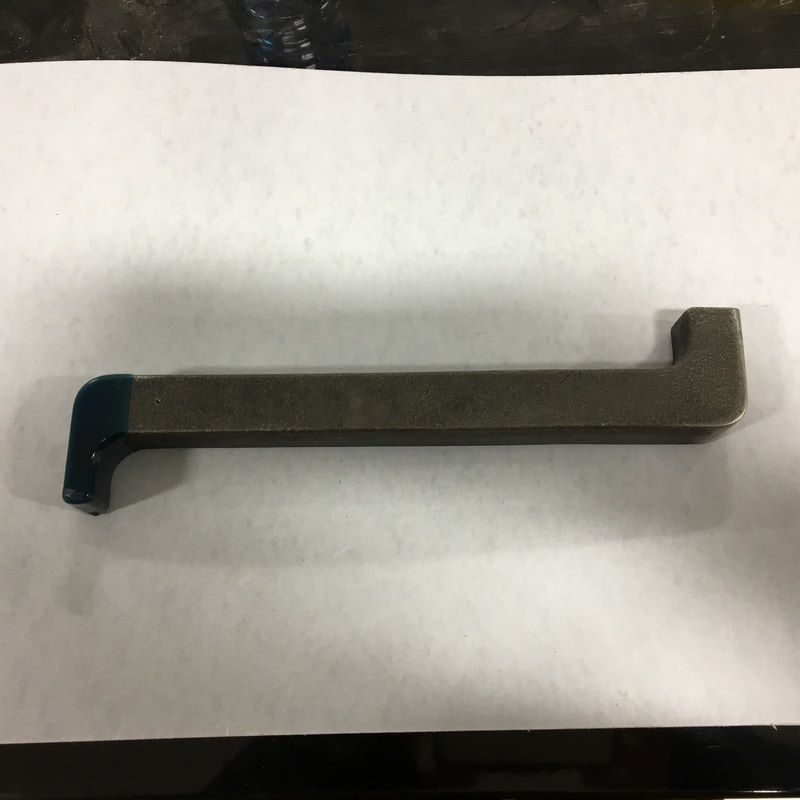 That 90 degree angle at the end lets you reach the far side of the stringer, like so... 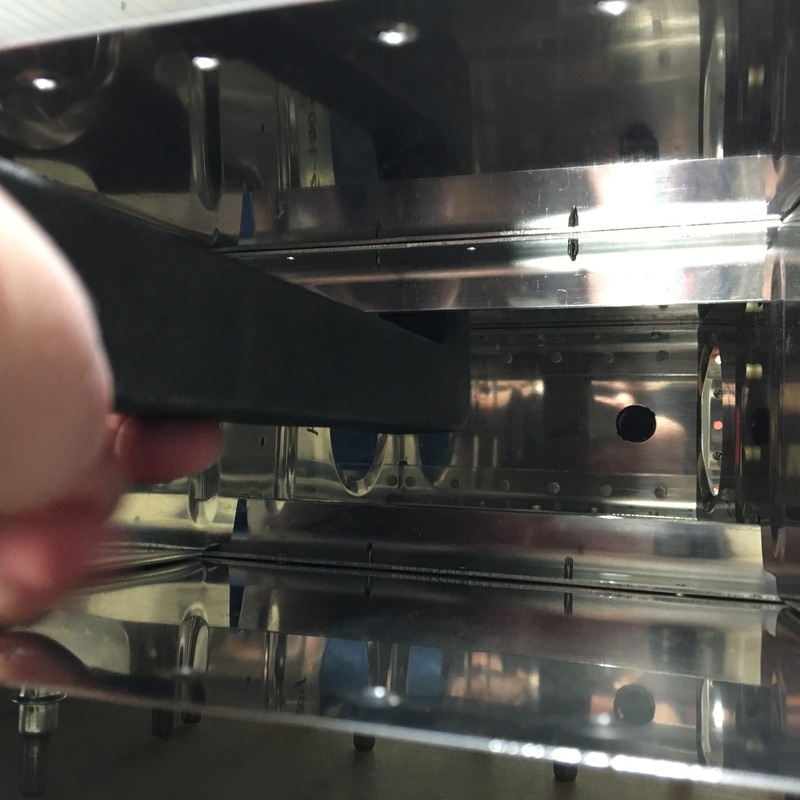 I don't even have to stick my entire arm inside! It was some of the easiest riveting we've done on the whole plane and this is where I had a major plane building epiphany. A heavier bucking bar makes all the difference! I've almost exclusively been using our small tungsten bucking bar and while it's dense, it's too small to be very heavy. That means it bounces all over the place while we are riveting. The angled bucking bar I used for the stringers is made out of steel and that thing barely moves when we rivet. You don't want to drop it on your toe, but the decreased movement means my hands don't take such a beating as they get bounced around. It has also increased my confidence because I'm able to hold the bar in place more easily. That didn't stop me from completely mangling a rivet, but it's the only one that I've messed up in several weeks. Mike made me take a picture of it because it truly was a magnificent mistake. 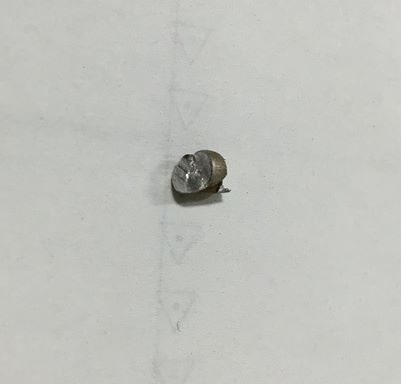 Next, we'll finish riveting the ribs to the skin. I counted, and that will take another 140 rivets, easily 2 or 3 work sessions.
|
AuthorThe supportive spouse's guide to building an airplane. Archives
May 2017
Categories |


 RSS Feed
