|
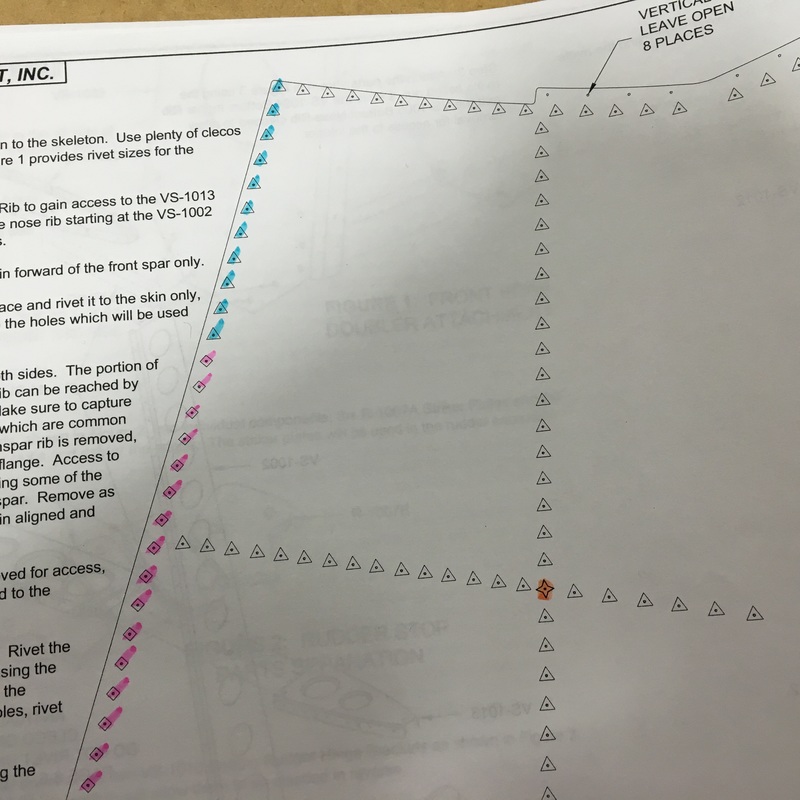
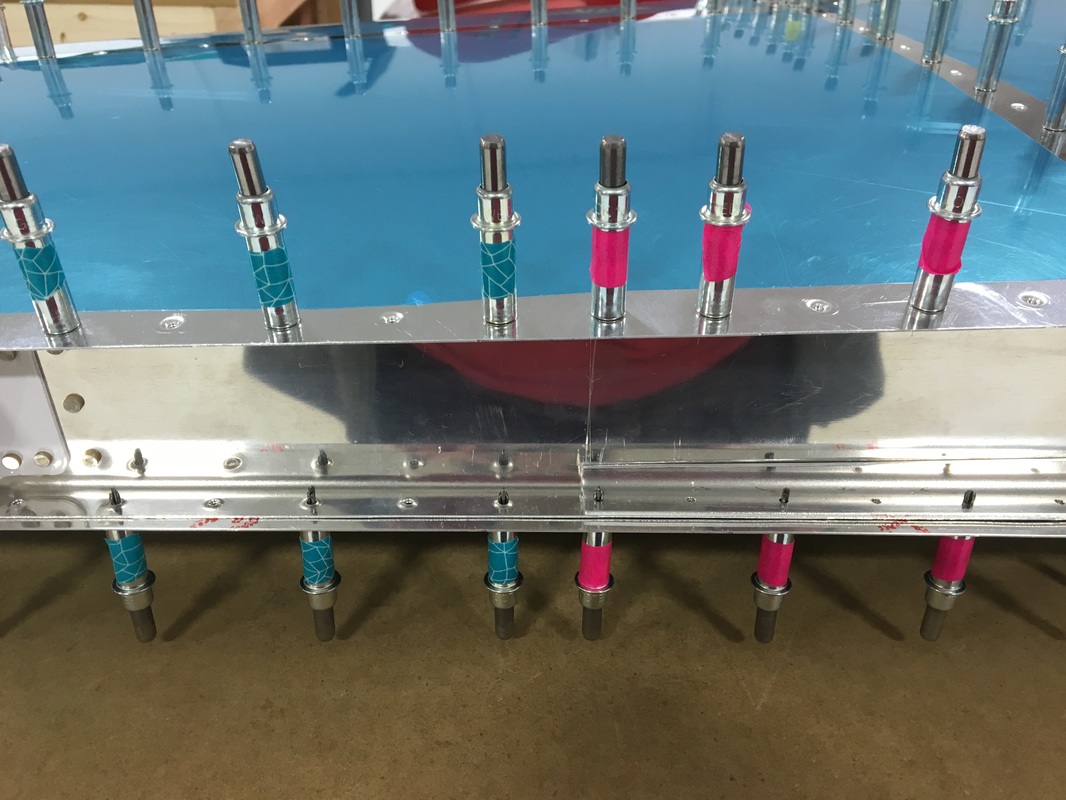
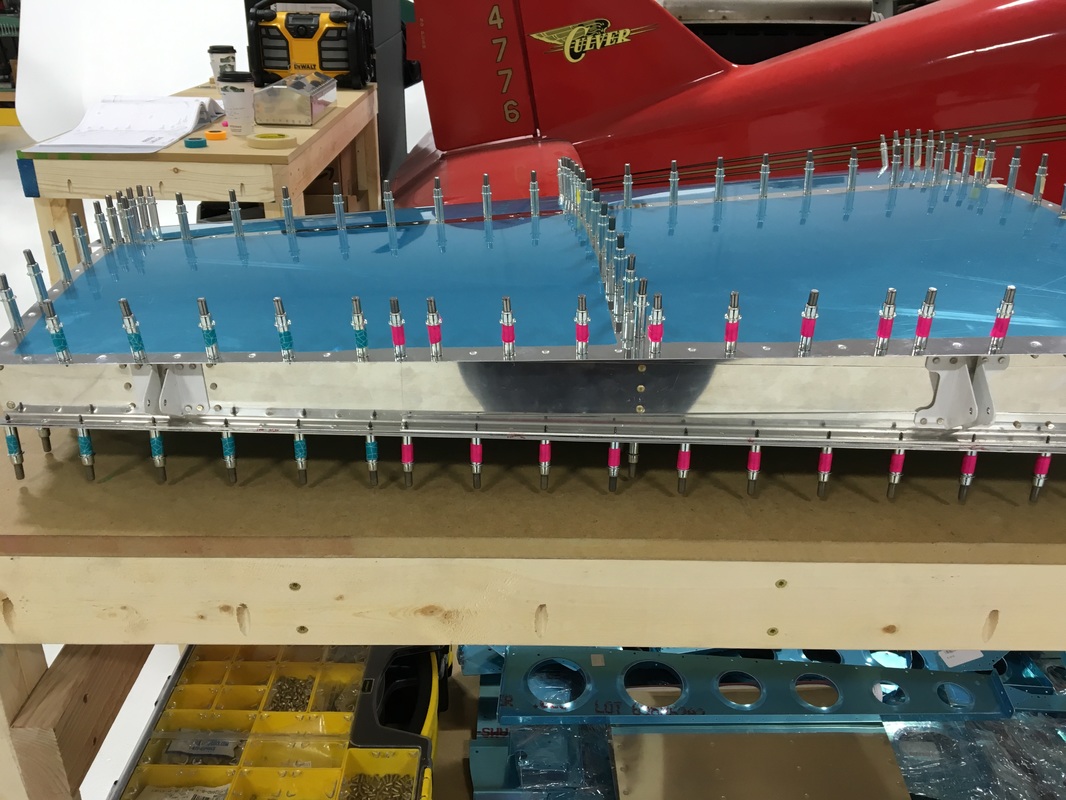
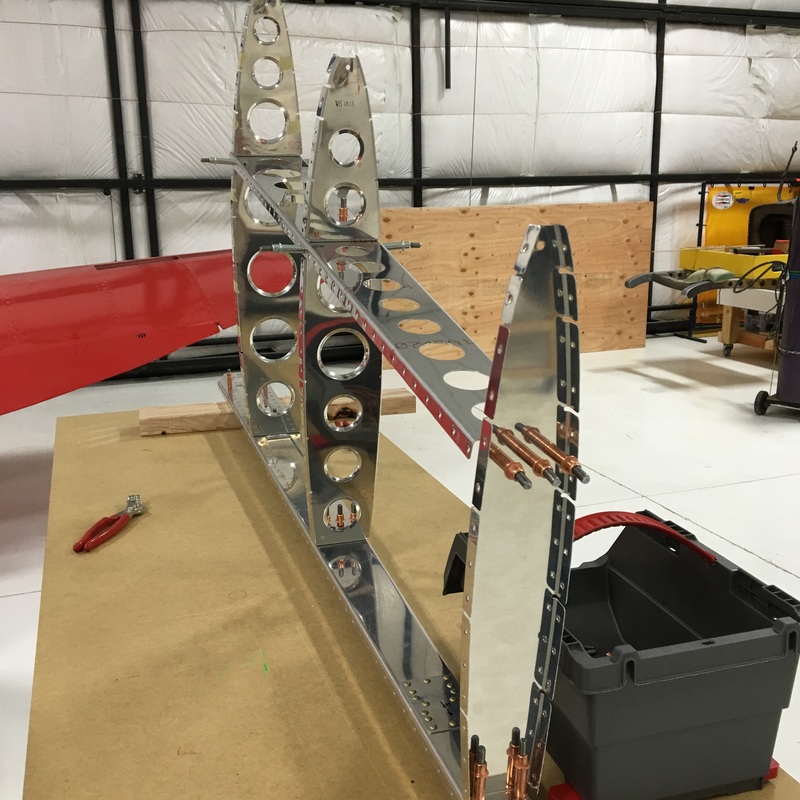
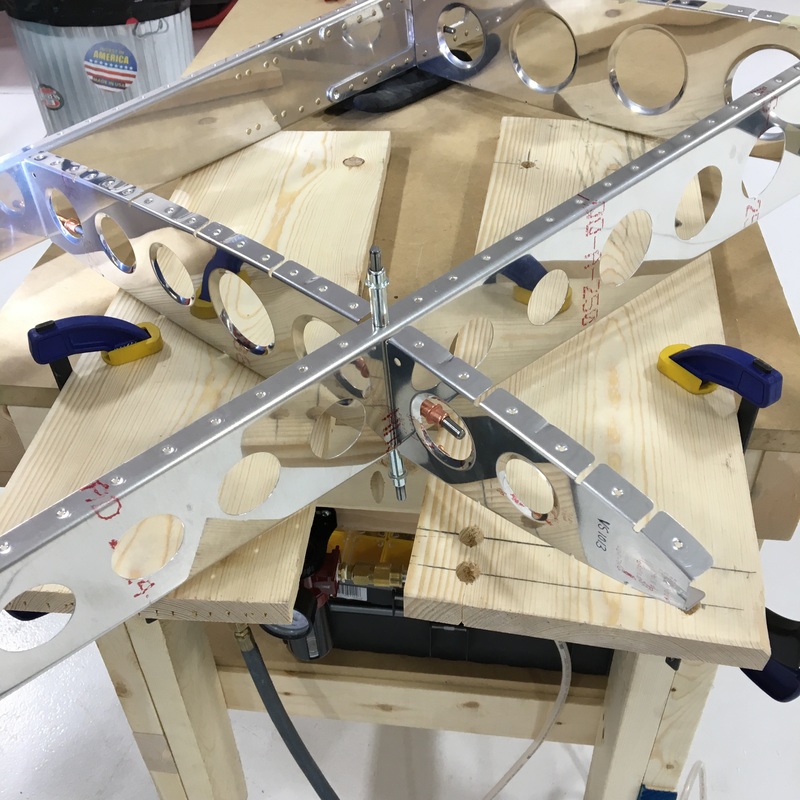
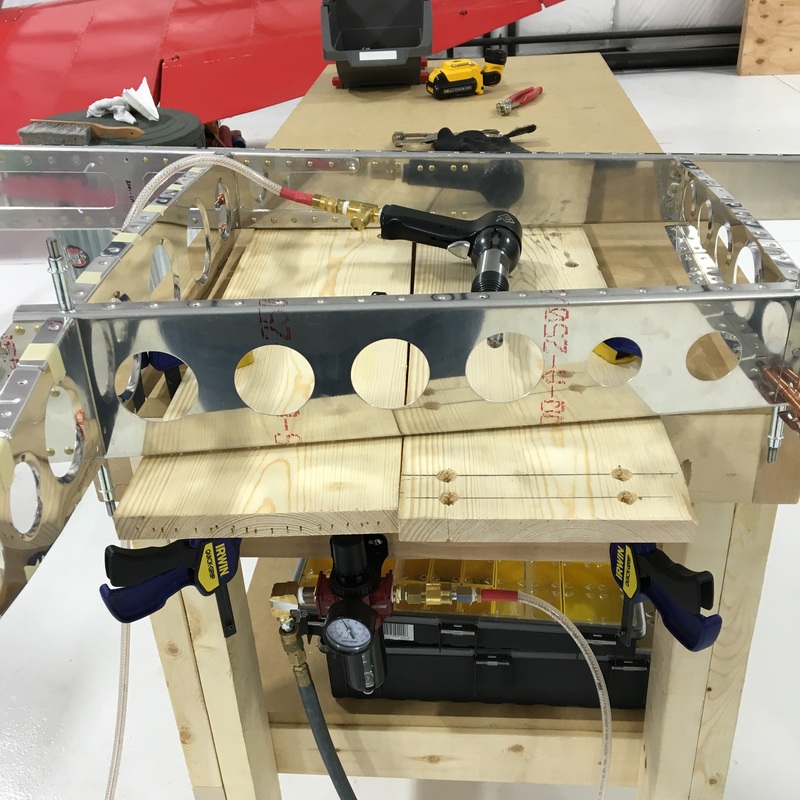
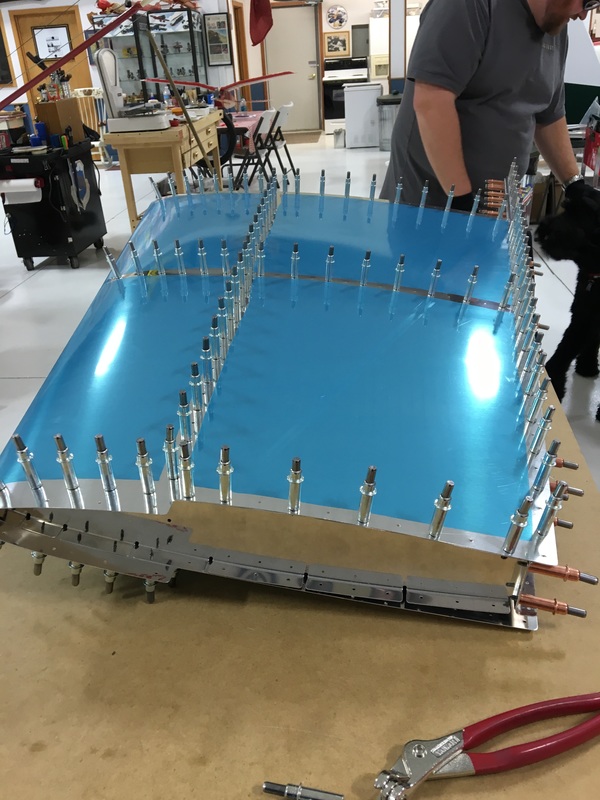
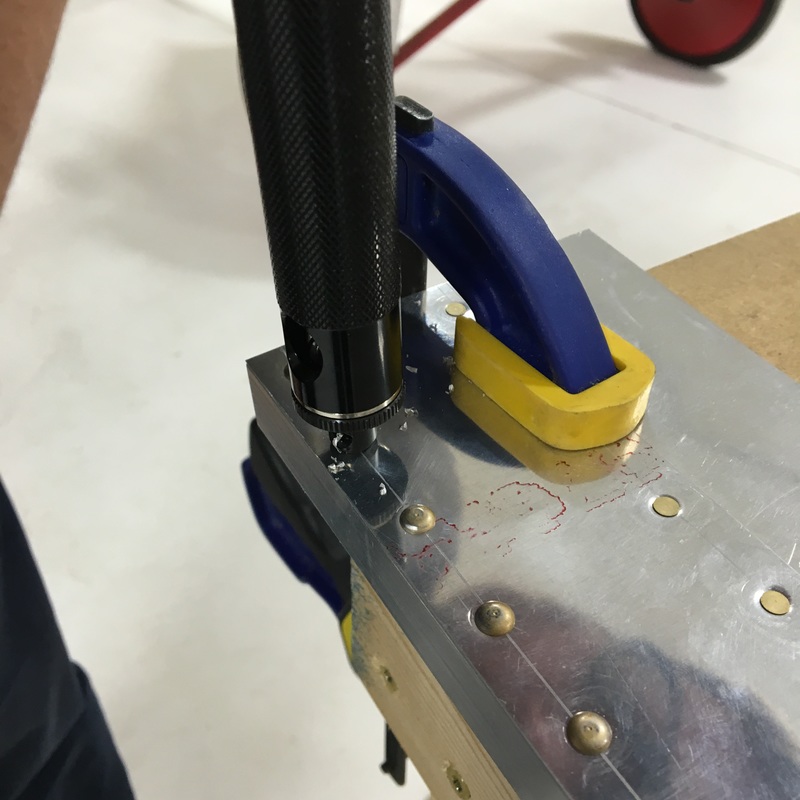
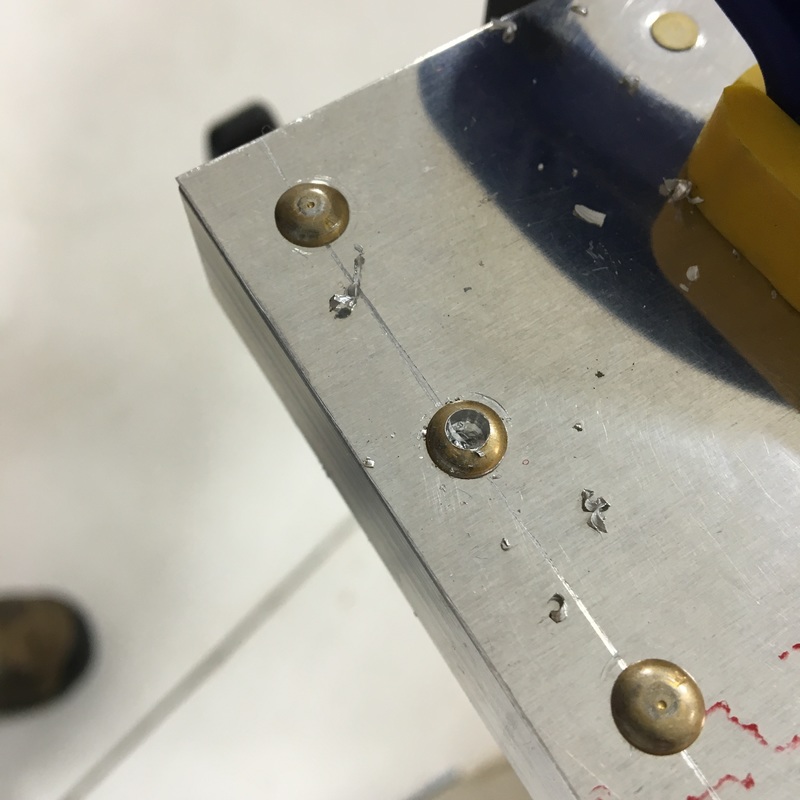
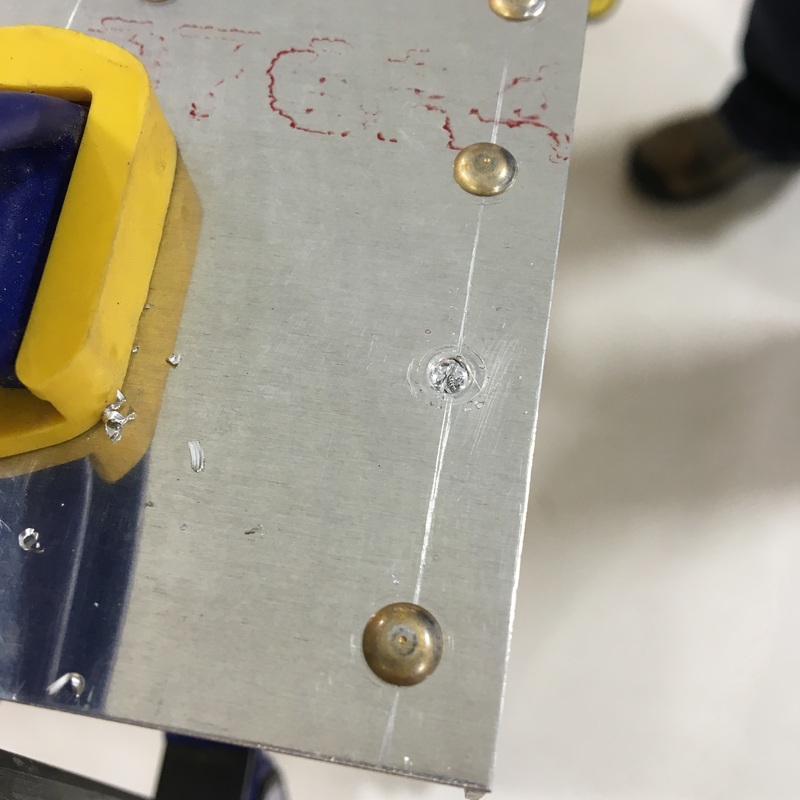
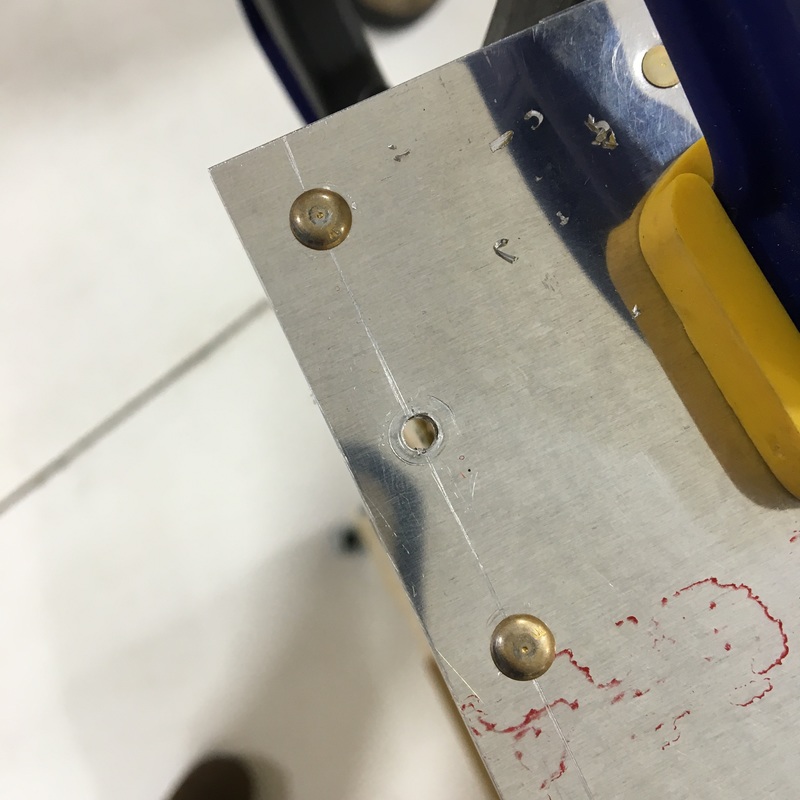
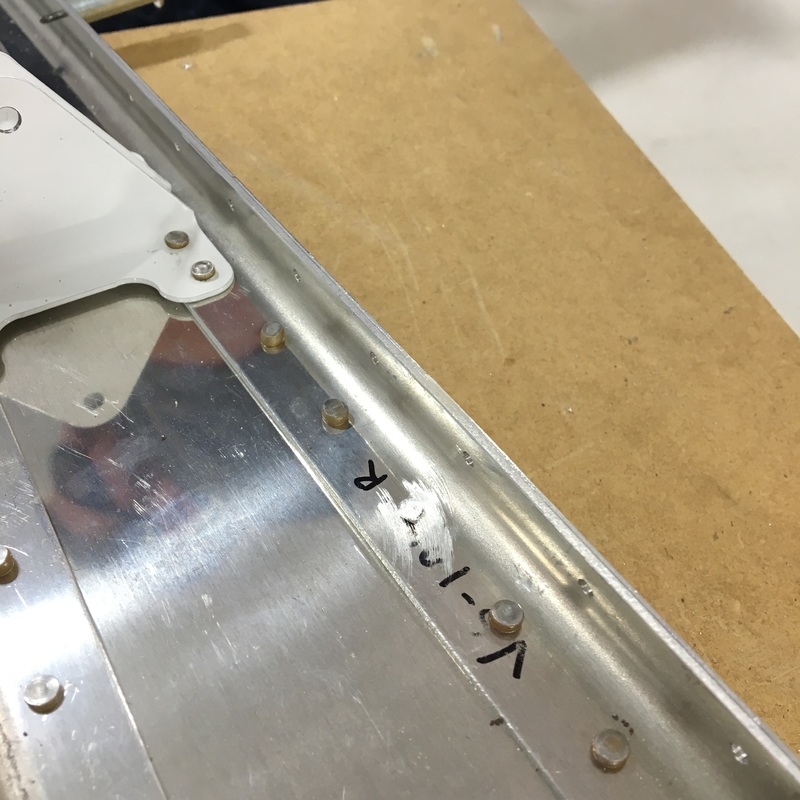
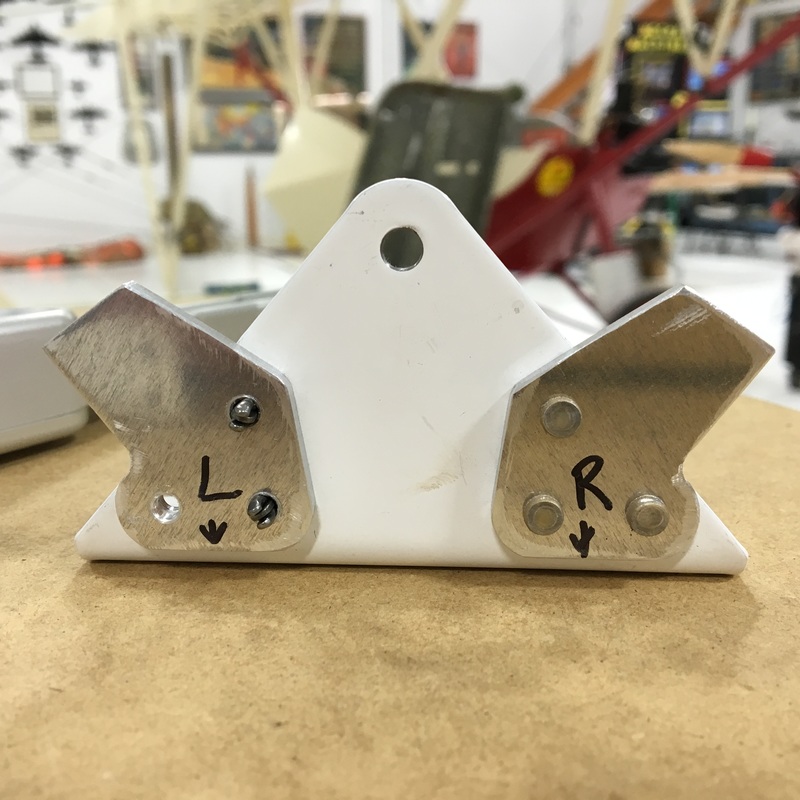
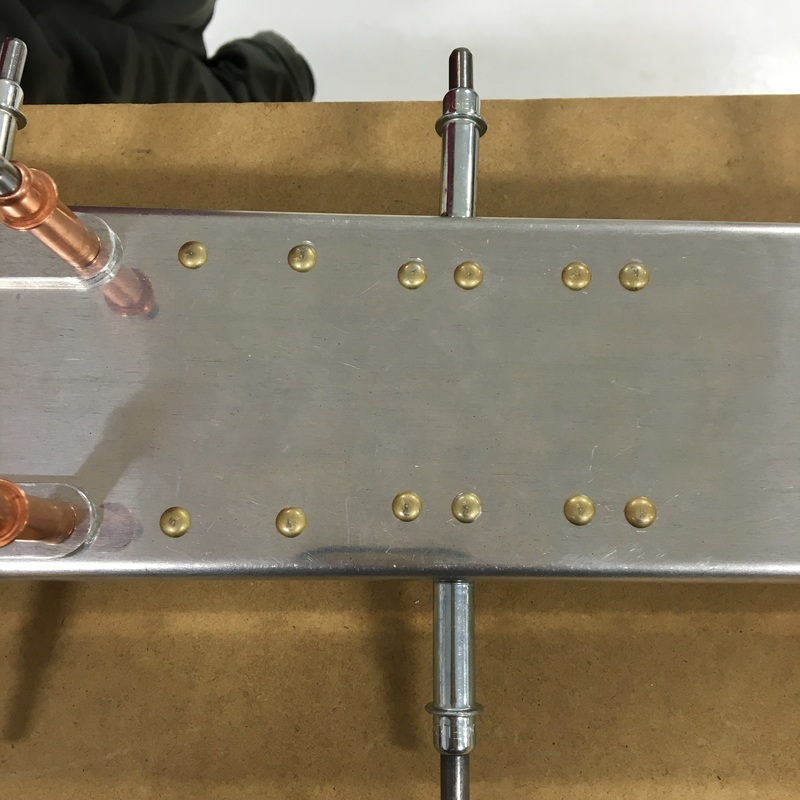
You may remember that we've had some trouble in the past with accidentally using the wrong size of rivet. That's because the directions for riveting look like this: 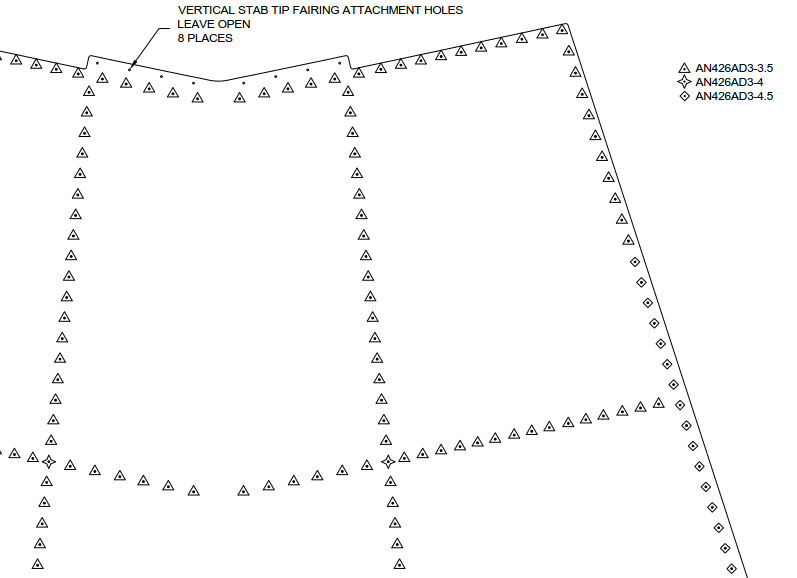 Be careful not to misread one of the symbols in the drawing, or one of the numbers in the rivet description, or miscount how many triangles there are before they turn into diamonds. I had an idea of how we could avoid a repeat of our last adventure with replacing rivets and it involved crafting supplies. Now, I'm not really a crafty kind of gal, but I have seen enough Pinterest posts shared on Facebook to know about washi tape. My bright idea was to buy matching sets of highlighters and washi tape and use that to keep us on track. We assigned a color to each shape on the drawing and then marked the corresponding cleco with the matching color of tape. It worked surprisingly well and made for some very colorful airplane pictures. Quite honestly we could have used a lot less tape and just color coded the first and last cleco for each size of rivet. But...I liked the way it looked and went a little crazy (maybe I'm a little more crafty than I want to admit). So, here are some gratuitous photos of taped clecos. In my last post, I mentioned that the instructions for this part of the build are very, very important. Here's why...the vertical stab is essentially a long, box and all six sides of that box are sealed. But wait, you may say, what about that row of clecos that runs down the center of the skin. How can you possibly put a rivet in those holes if all sides of the box are sealed? Hence, the importance of carefully following the instructions. At some point, some really experienced builder figured out exactly how to reach every single rivet hole and put all of that information in the instructions. Here's a sample: 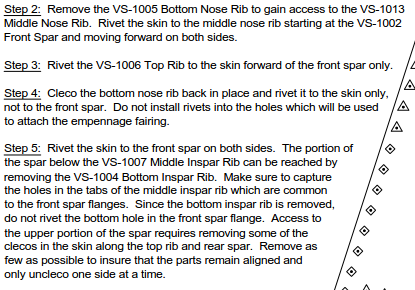 Clear as mud, right? Basically, you remove certain strategic pieces of the skeleton so you can reach different sections that you need to rivet. The rivet gun is the only way you can install these rivets because there's just absolutely no way to could get a rivet squeezer big enough to reach these middle rivets. (OK, I hope Mike doesn't read that last sentence because there probably is some sort of (really expensive) rivet squeezer that could do that job but I just really don't want to buy any more tools right now.) The first thing we got to do was out a piece (the bottom nose rib) so I could reach inside with the bucking bar.  I didn't measure the distance from the edge of the vertical stabilizer to those center rivets but I can tell you that my entire arm, all the way up to the shoulder, was inside that thing. I definitely had the harder job in this case because not only was I trying to fit my entire arm inside of that narrow hole, but I was also holding a heavy bucking bar in my hand. It is also really hard to get the bucking bar in the right place when you can't see what you're doing. We had a few missteps, but here are the first rivets that will actually be visible on the outside of the plane. 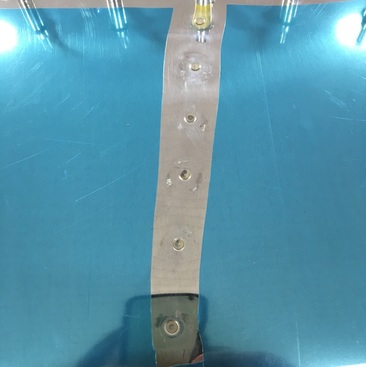 If you look closely, you'll see a divot around the second rivet from the top. That's where I thought I had my bucking bar in the right place, but was wrong. I also now realize why Rosie the Riveter was so buff, this is a great arm workout. Two hours later, we are about half way done. We still have to do the area in the upper left hand corner where you see all the clecos. That should be really interesting because the only way to access the center rivets in that section is to remove as few clecos as possible and stick your hand under the edge of the skin. Doesn't that sound like fun? 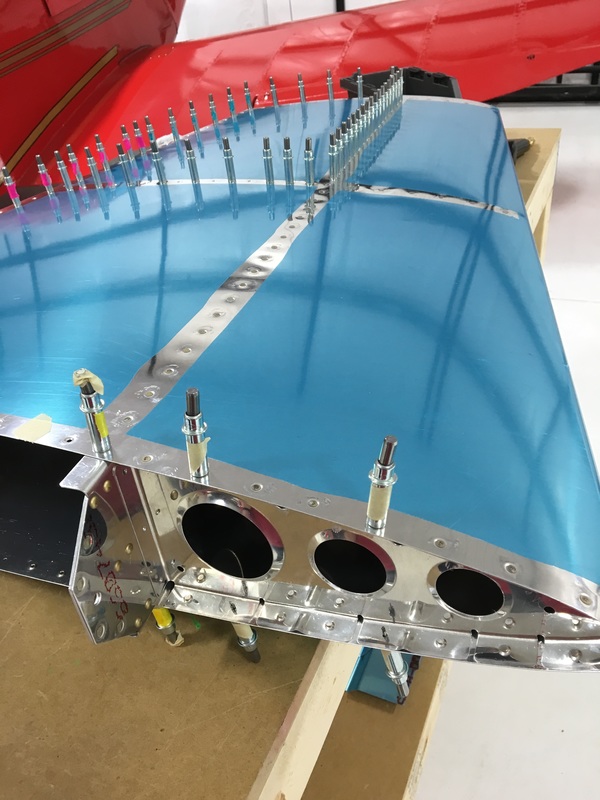
3 Comments
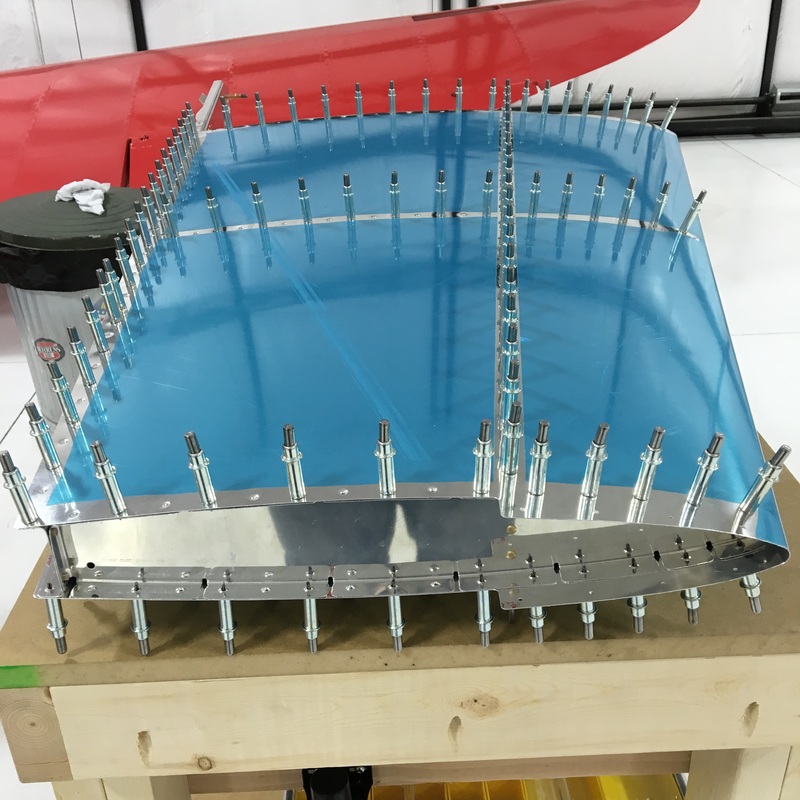
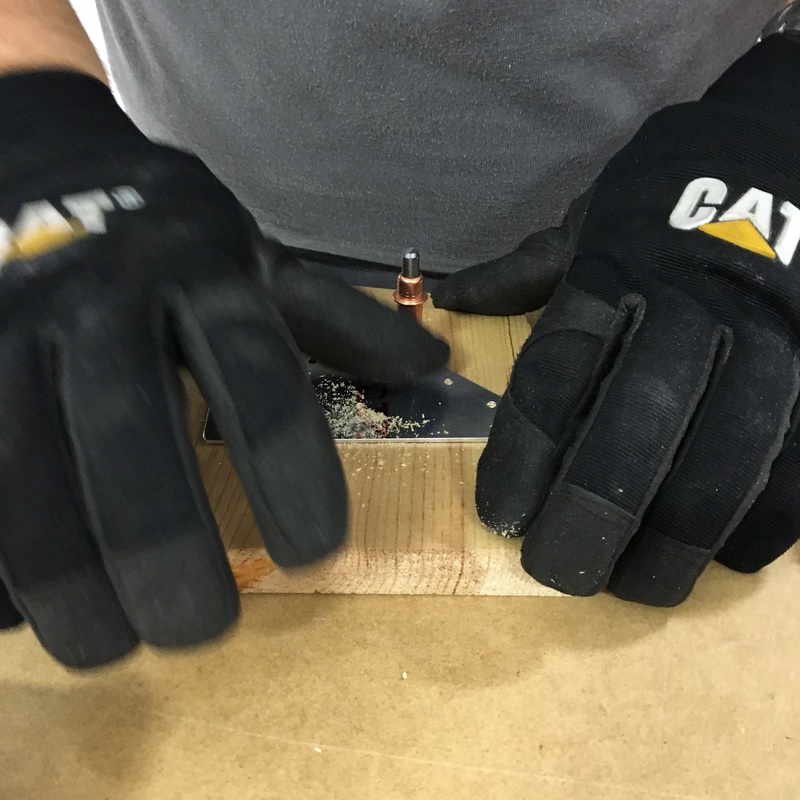
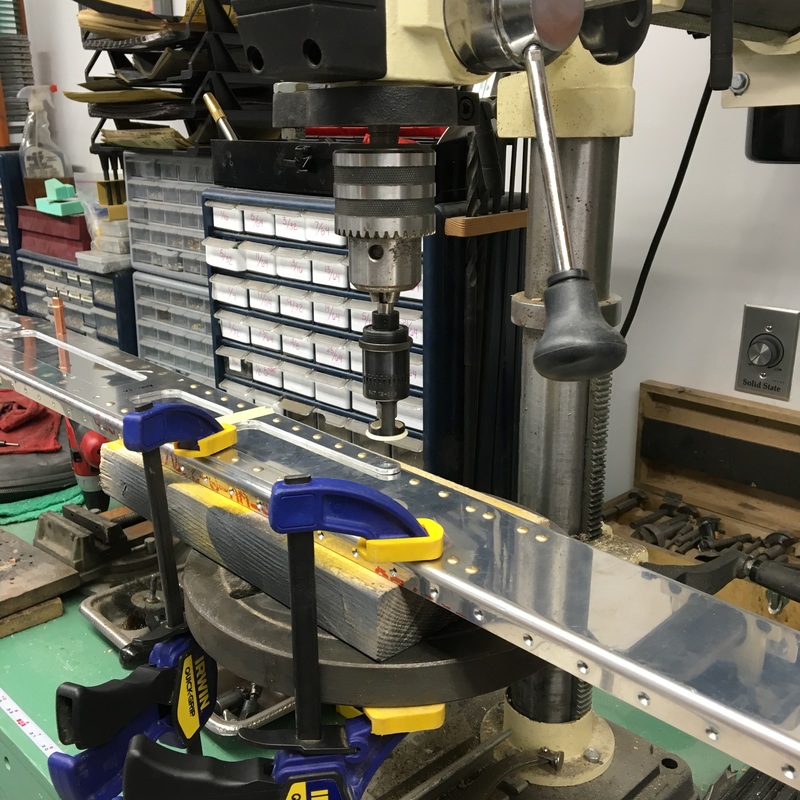
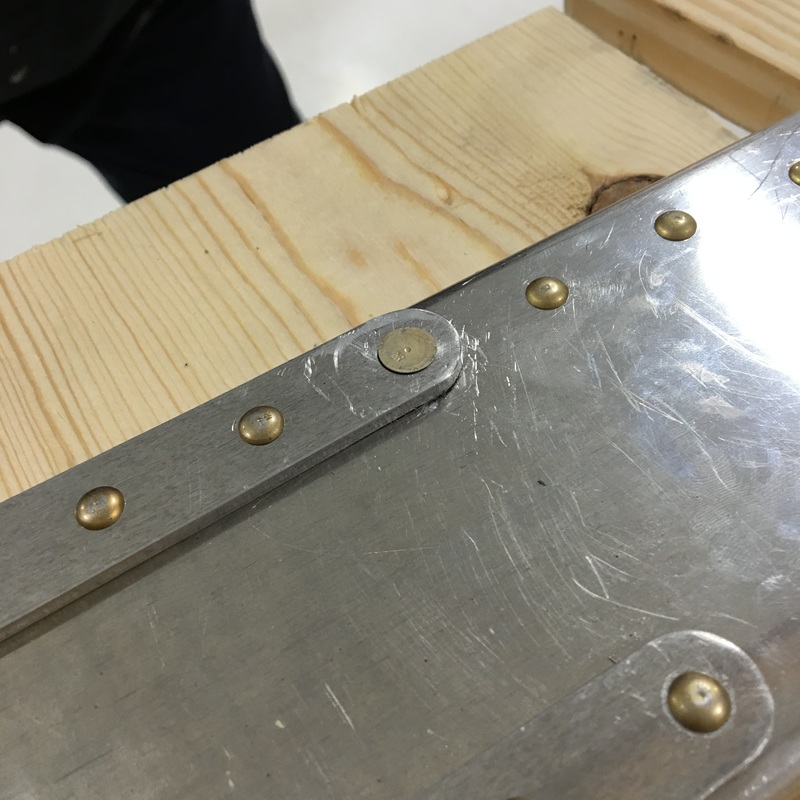
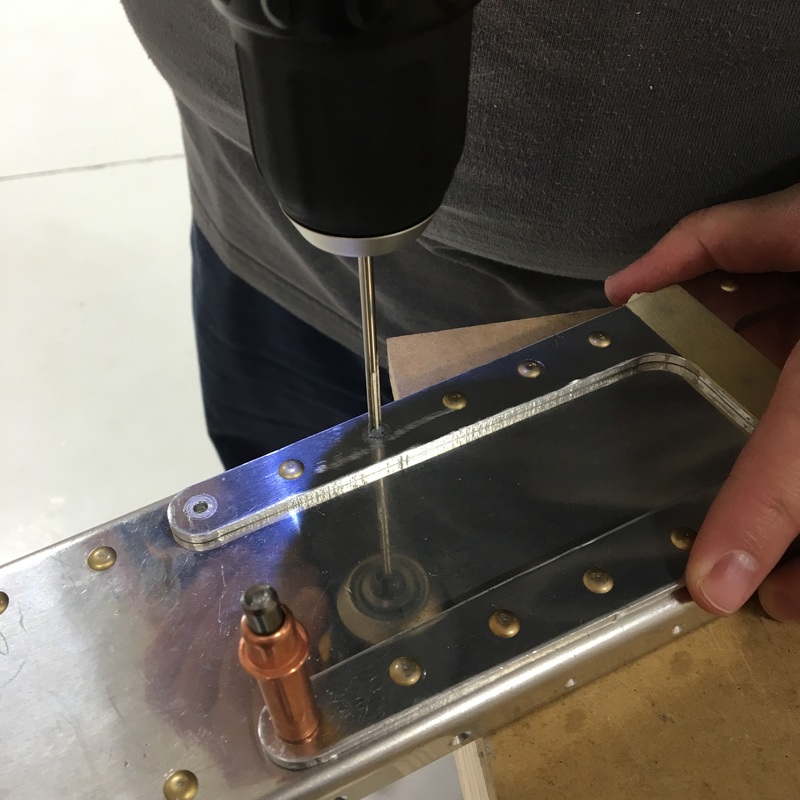
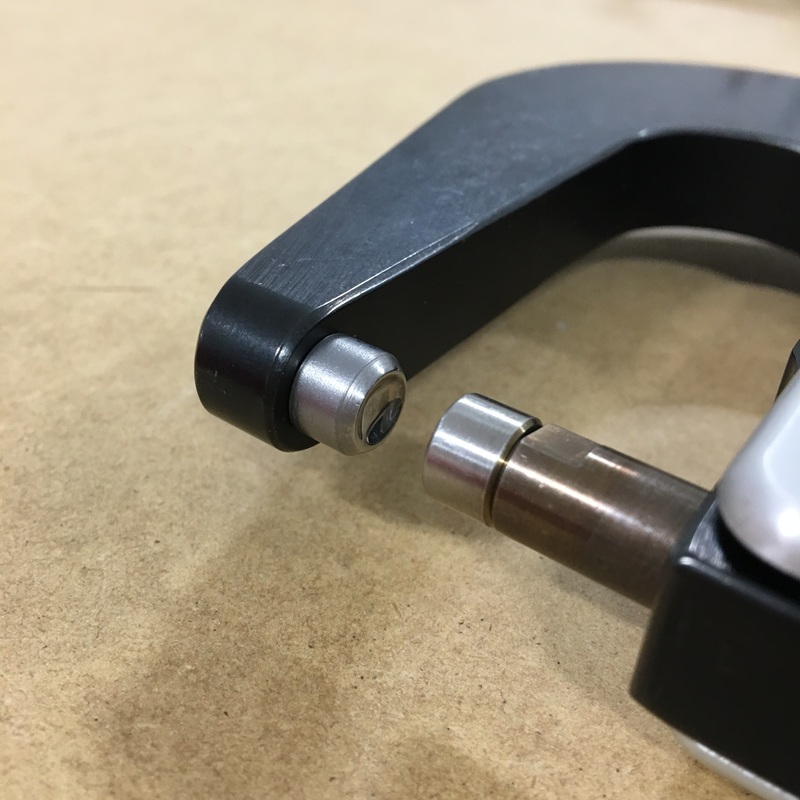
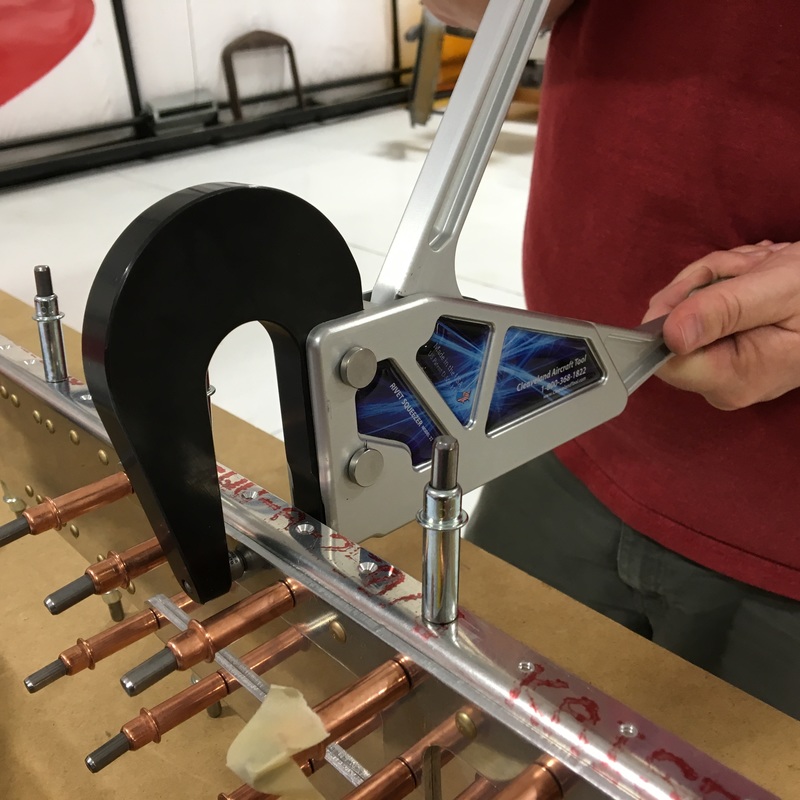
Now that we've fixed the problem started by that rogue drill bit, we can finally begin final assembly of the vertical stabilizer. I honestly can't even remember how long we've been working on this one piece of the plane. Has it been two months, three? OK, so I just looked back at my earlier posts and it's only been about six weeks. It just feels like a lifetime. This is the part of building that gets really exciting because you can finally see a finished product. It's also the part of the process where the instruction manual becomes very, very important. I'll talk about that in my next post. For the very last time, we assembled all of the pieces that we've been working on to create the skeleton of the vertical stabilizer. First, we used clecos to hold everything together, then we put in the final rivets. Amazingly, the whole skeleton is only held together with 11 rivets. Even riveted together the vertical stab felt really flimsy at this point. Mike assures me that most of the strength and stability comes from the skin being riveted onto the skeleton. Everything on the skeleton is curved so we had a few challenges installing some of the rivets. To make everything even harder, there were a few clecos that stuck out at odd angles but couldn't be removed. We finally figured out that if we clamped some boards to the end of our work bench, we could move those boards around to accommodate whatever structural components or clecos were in the way. We also had our first opportunity to do some offset riveting. An offset rivet set has a curve so you can work in tight areas or around structural components. It was kind of weird to use but we tried it out on some practice pieces first and everything went just fine. 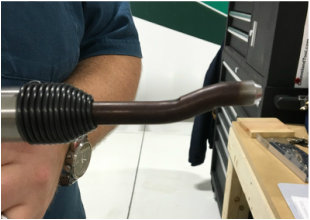 Once the skeleton was riveted together, we put the skin on over the frame. Two hundred clecos later, it looked like this.  Now just for fun, here are two pictures of the vertical stabilizer. One of these pictures is from the first time we put the vertical stab together on January 16. The other picture was taken last Saturday, February 18. Can you tell which is which, because I sure can't? One month of work and we're right back where we started. I've realized that I completely misunderstood the amount of energy required to build a plane. I don't mean that building a plane is physically hard, because honestly it's not. At this point, at least, the parts are small and nothing is particularly heavy. The thing I got wrong was that I underestimated the amount of mental energy it would require. I've referred to it before, but building is really just one long exercise in problem solving. Mike knows A LOT more about building a plane than I do - he's been reading about kit planes and anticipating this project for more than 10 years - but this is still his first build. You've read everything that I know about building airplanes because I've written it all down here. We are both in new territory and spend a lot of time questioning if what we are doing is correct or good enough. Add to that uncertainty our recent stretch of, not so much bad luck, as things just not going quite right and I think we're both a little mentally worn out at this point. For every thing I've written about in the past, there are probably 2 or 3 other problem solving steps that I could have included. I'm trying to stay positive about the build, so today I thought I'd write a little bit about the types of problems we are encountering and how we solve them. A couple of weeks ago, we encountered two specific problems. First, Mike has trouble drilling the countersinks into a small, thin piece of reinforcing metal. Here's a picture to remind you of what happened. That hole should be perfectly round, which is very obviously is not. We had to order a replacement part and start over. 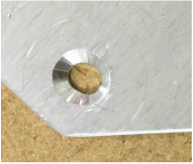 Mike did a little research and found an ingenious way to make sure that the metal stays still while he makes the countersinks. He drilled holes into a scrap of wood and used clecos to hold everything still while he drilled the countersink. Two minutes later, the replacement piece was ready to use. I was surprised that you could use clecos this way. I think I suggested to Mike that when we're done building we could use all of clecos to design some sort of wall mural in our house. I was joking but if you visit us at some point in the future and see a wall full of clecos, you can remind me to keep my mouth shut next time. Yesterday we decided to tackle our big problem from last week - the ugly mess created by the broken drill bit. We spent a lot of time discussing the pros and cons of the two options we had come up with - making the hole bigger and using a universal head rivet two sizes larger or countersinking the hole and using a flush rivet one size larger. We decided to try option 2 to get rid of most of the damage by countersinking That way, if things really don't work we still have the option of using a an even larger size rivet. Creating that countersink was a really nerve wracking process, probably because last time we tried to fix the problem we just made it worse. Mike used a drill press to make sure the countersink was centered properly. We don't actually have any of the size rivets we will be using so he had to use calipers to get the hole the right dimensions. The countersink removed most of the damage and hopefully it will be all right. Once the countersink was done, he enlarged the rivet hole (from the back). We had to order the rivet we needed to finish the repair. Actually we had to order 1/8 of a pound of rivets because that's how they are sold. We had hoped to use a rivet only one size larger, but the countersink was too large so we had to go up two sizes. Below you can see how the first rivet was way too small (left picture) and the properly sized rivet on the right. We also got to try out a new tool that Mike ordered called a chip chaser. It's a really thin piece of metal with a hook on the end that you can use to remove aluminum chips from tight spaces. Honestly, it looks like a tiny "slim jim" that you'd use for unlocking a car door. It was pretty hard to fit even that thin piece of metal in between those two pieces but we pulled out a few tiny pieces of aluminum so I guess it was a good idea. Finally, after several weeks of trouble shooting and ordering tools and rivets, we finally go the problem fixed! 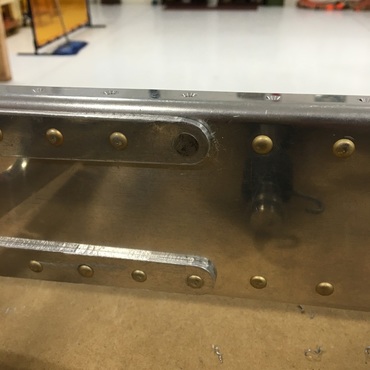 That single rivet has really held things up because we can't move forward with any assembly until that problem was fixed. Our next steps are to reconstruct the vertical stabilizer skeleton and rivet the skin into place.
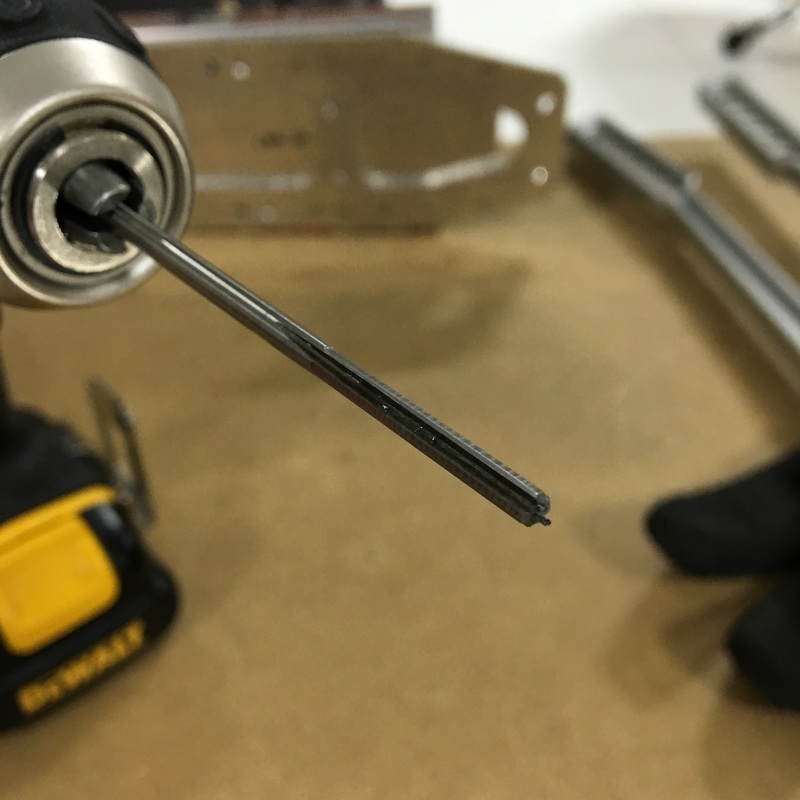
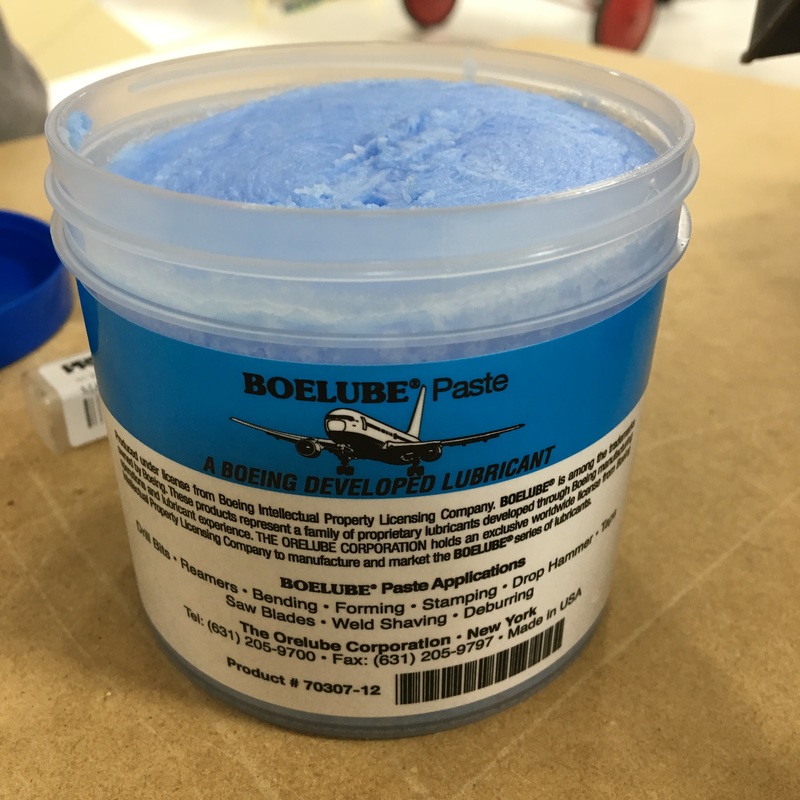
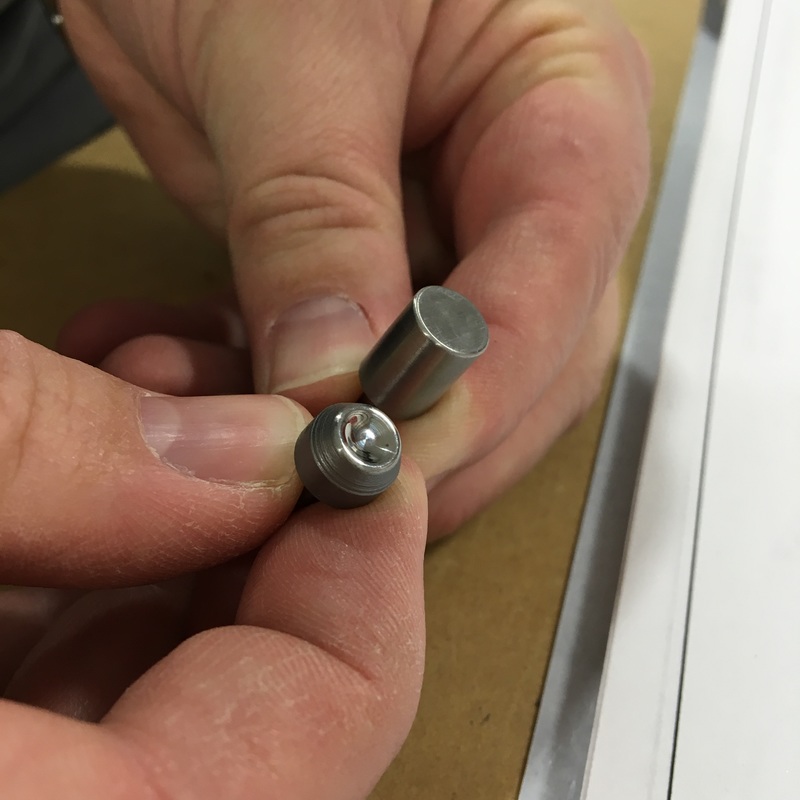
In theory, removing rivets is easy. I believe that last sentence is what they refer to as foreshadowing. It took us two hours to undo our mistakes from last week. Yes, two hours to remove and replace six rivets. Actually, if I'm being honest it took about 45 minutes to remove one rivet and then a little over an hour to replace the other five. We even practiced with the new rivet removal tool first so we wouldn't mess up the actual plane. Unfortunately our practice conditions weren't very realistic for the situation that we were dealing with. The theory of rivet removal goes like this: 1. Remove as much of the rivet head as possible; 2. Punch out the remaining shank of the rivet (that's the straight part of the rivet, it can also be called the shaft); 3. Replace the rivet. We followed that process and it worked pretty well on our practice piece. We even got a special tool that helps with drilling out the head of the rivet (we spent most of this last week waiting for that tool to arrive). You can see that rivet removal tool in the upper left picture below. There is a drill bit inside that big black tube and a guide on then end that fits over the head of the rivet. This is supposed to help you drill exactly in the center of the rivet so you don't accidentally damage the surrounding metal. Once you get the rivet head drilled out (top middle picture) it's easy to snap off the rest of the head (top right pic and bottom left). Finally you use a punch to push what's left of the rivet out of the hole (bottom middle and bottom right pics). It all worked perfectly on our practice piece. When everything goes smoothly, this is what you end up with: 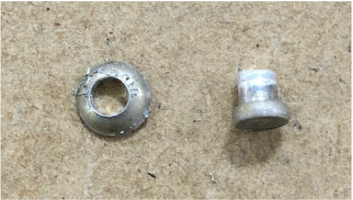 Once we practiced that process a few times, we started work on the actual plane and things didn't go quite so well. Our first problem was that the rivets on the plane were quite a bit larger than the rivets on the practice piece. Mike was able to drill and remove the head of the rivet just fine, but the shank seemed like it was welded in place. Mike tried and tried to hammer the shank out of the hole but we didn't have any luck. We figured that we hadn't drilled deep enough when removing the head so Mike tried to use the drill to remove a little more of the rivet. That's when we encountered problem number two and things started going really wrong. The second problem was that the drill bit that came with the rivet removal tool was a piece not very high quality (a.k.a. a piece of junk) and broke almost immediately. I guess the third problem is that we didn't notice the broken drill bit because it was hidden by the outside casing of the rivet removal tool. I didn't get a picture of the broken drill bit, but the end of was totally mangled. When Mike tried to drill out a little more of the rivet the bit started to shimmy all over the place and we ended up with a pretty ugly mess. 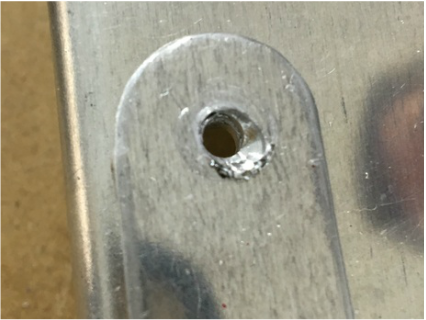 Building an airplane seems to be largely a process of solving one problem after another. In the picture above, you are seeing the final product - after we spent another 20 minutes to get the rest of the rivet out. That was quite a process and involved lots of discussion and weighing of pros and cons. I doubt our final solution was win the approval of an experienced builder but we managed to make it work. We decided that it would be best if we removed the shop head of the rivet and drilled it out from the other side. We did that using an angle grinder. Then Mike very carefully drilled of the remaining rivet shank using a drill bit that wasn't broken. Once we discovered the rogue drill bit and replaced it, the rest of the rivets came out pretty smoothly. When we started replacing the rivets we had a couple of places where it seemed like the holes had shrunk and the rivet wouldn't fit. 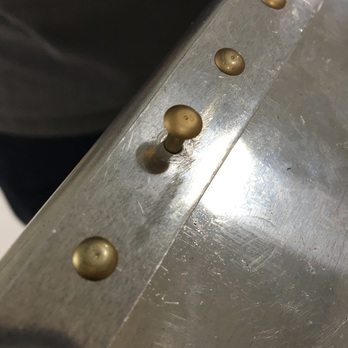 Help, I'm stuck! It's a pretty common problem when you are replacing rivets. Some tiny little piece of metal gets stuck in the hole and binds everything up. Mike used a special drill bit, called a reamer, to clear any debris from the hole. The reamer is designed so it won't enlarge the hole the way a regular drill bit might. The best part is that when you use a reamer you get to use this stuff called BoeLube Paste. We got the rest of the rivets replaced pretty quickly after this. We're still trying to figure out how to deal with problem we created thanks to the faulty drill bit. We are considering two possible solutions right now - make the hole big enough to get rid of the problem or use a countersink rivet here instead. Neither is a great solution and we are weighing our options. New Vocab:
Shaft/Shank - the straight "pin" on a rivet Reamer - a special drill bit used to remove debris from a rivet hole (it probably has more uses but I don't know what they are yet) It seems like I say this every time I start writing, but it's been a big week for us. There are just so many milestones as we really start building the plane. Every time we work it seems like we are doing something for the first time. This week we set our first rivets and made our first mistakes. We'll get to the mistakes, but let's start with the rivets. Those three rivets may not look like much, but they represent a big first for us. Now that those rivets are in place, we will never have to take those pieces apart again. Once we repeat that process about a million more times we will have an airplane. I'm not quite sure what this part is, I think it's a bracket that will eventually connect the vertical stabilizer and the rudder. You may notice that the rivets we used are different than what I've talked about in the past. There are two different types of rivets - flush rivets which is what I've talked about before and universal rivets, which is what you see above. Here's a practice kit Mike worked on that shows both kinds - flush rivets on the left and universal on the right. The vertical stab uses both kind of rivets. I'm not quite sure when and why each different type of rivet is used.  We used the squeeze riveter almost exclusively while putting together the vertical spar. The piece isn't all that big, so all the rivets can be reached with the squeezer. It's also much quieter because we don't have to run the air compressor. The hangar is a shared workspace and when other people are up there we try to keep noise to a minimum. When using universal rivets, you use a die with a little divot that fits right over the domed rivet head. When you squeeze the handles together it squishes the rivet in the right shape. I really enjoy using the squeezer because you can watch the rivet as it changes shape. There's even a little wisp of smoke (or something?) that comes from the rivet as it gets squished. Riveting is one of those tasks that we've found is MUCH easier with two people. Mike will run the squeezer while I hold the piece steady and make sure everything is lined up. Honestly, with the size rivet we are currently using, I'm just not strong enough to squeeze the rivets anyway. It takes a lot of strength and even Mike gets tired out after awhile. There's a lot to pay attention to while squeezing rivets. The cupped die has to sit just right on the domed head of the rivet. The head of the rivet needs to sit flat against the metal surface of the piece. The rivet needs to be perpendicular to the hole so the shop head is an even thickness and isn't angled. It's very easy for things to move out of alignment once Mike starts to squeeze the handles together. We had really good luck with our first several rivets and then we made our first mistake. In the picture to the right, you can see that the rivet isn't sitting flat against the metal. This happened because things just weren't quite aligned and that gap was there when we started squeeze the rivet. The problem is that as you squeeze the two ends of the rivet together to form the shop head, the rivet also squishes outward. Imagine an Oreo cookie - if you squish the two cookies together, the filling in the middle compresses but it also starts to squish out from in between the cookies. Even though we had only applied a little bit of pressure, this rivet was already too fat and wouldn't budge. Once there's a problem with a rivet, the only way to fix it is to completely remove the rivet and start over. We knew this was going to happen (many, many times) during the build so it's not a big deal. Actually, right before this happened I asked Mike if we had the right tools to remove a rivet if necessary. The most amazing thing about the whole situation is that we don't actually have the right tool. I would had sworn that Mike has bought every airplane building tool known to man. So, with my blessing, he gets to order another tool. Now that I think about it, maybe he orchestrated the whole thing so he had a reason to get more tools... As we were inspecting and discussing our bad rivet, we realized that we had actually been using the wrong size rivets and we were going to need to remove and replace several of them. The construction manual describes exactly which size rivet should be used in every single hole. The particular size of rivet is (presumably) chosen for a good reason, and since the rivets we were using were shorter than they should have been we decided that they needed to come out. You can see our mistakes in the picture below. The rivet that wasn't set properly is the one on the right labeled "bad replace". The rivets covered in tape and marked with an "X" are all the wrong size. We had put several other (correctly sized) rivets into this piece by the time I took the picture - they would be the ones not covered in tape. If you're curious, the clecos with tape on the top are marking holes that won't get rivets at this stage.  This really isn't a very surprising mistake if you consider the drawings we are trying to follow and the way that rivets are named. Here is a picture of the diagram we were trying to follow. The picture below is about twice the size of the actual printed version and only shows about a third of the diagram. 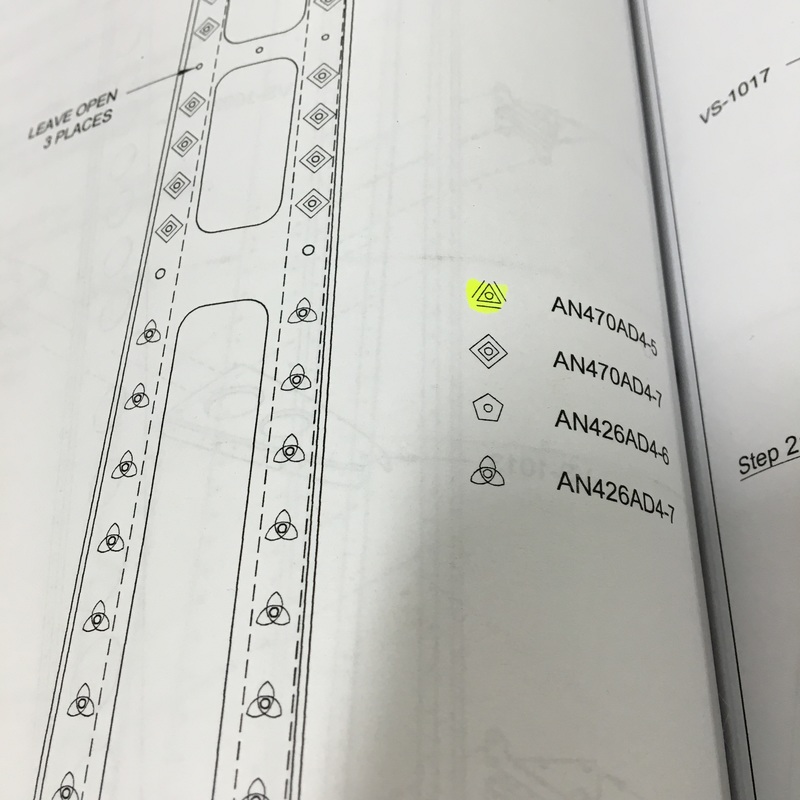 Each shape on the diagram corresponds to a different size of rivet, which is designated in the key on the right side of the page. All those numbers and letters in the "name" of the rivet mean something. The numbers in the middle tell you if it's a universal or flush rivet. The numbers at the end tell you the diameter of the rivet and the length. So in this case we probably should have been using the rivets that correspond to the diamond and accidentally grabbed the rivets that correspond to the triangle. I'm the one that grabbed the wrong size rivets so I've become a little paranoid and have been double and triple checking the diagrams ever since. It honestly isn't a big deal and we just laughed about it but it did make me realize how easy it is to misread these diagrams. Once we get the right tool we will remove those rivets and replace them with the correct size. Mike also had trouble with one other part this week and we got to order our first replacement piece. He was trying to countersink a small, thin piece of metal that provides reinforcement to another part of the vertical stabilizer. The size of the part made this process pretty difficult and the holes weren't round anymore when he was done. It's kind of hard to see in the picture below, but on the left side you can see that the hole is oblong rather than round. When Mike did some research online he found this is a pretty common problem with this particular part. We'll order a replacement (which thankfully only costs a couple of dollars) and try again. 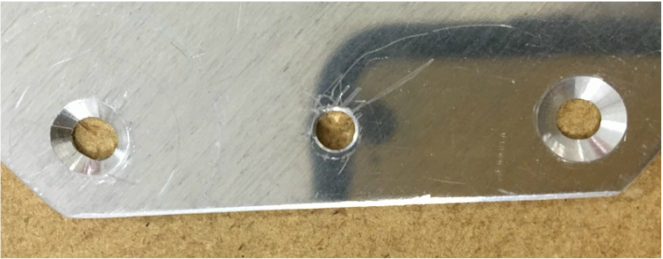 So, progress is stalled for a few days while we wait for the rivet removal tool and the replacement part. This time gives us a chance to figure out how to avoid these mistakes in the future. New Vocabulary:
Universal rivet - a rivet with a round, domed head Die - a tool that is used for cutting, shaping, or stamping a material or an object (definition from the Merriam Webster online dictionary) |
AuthorThe supportive spouse's guide to building an airplane. Archives
May 2017
Categories |


 RSS Feed
