|
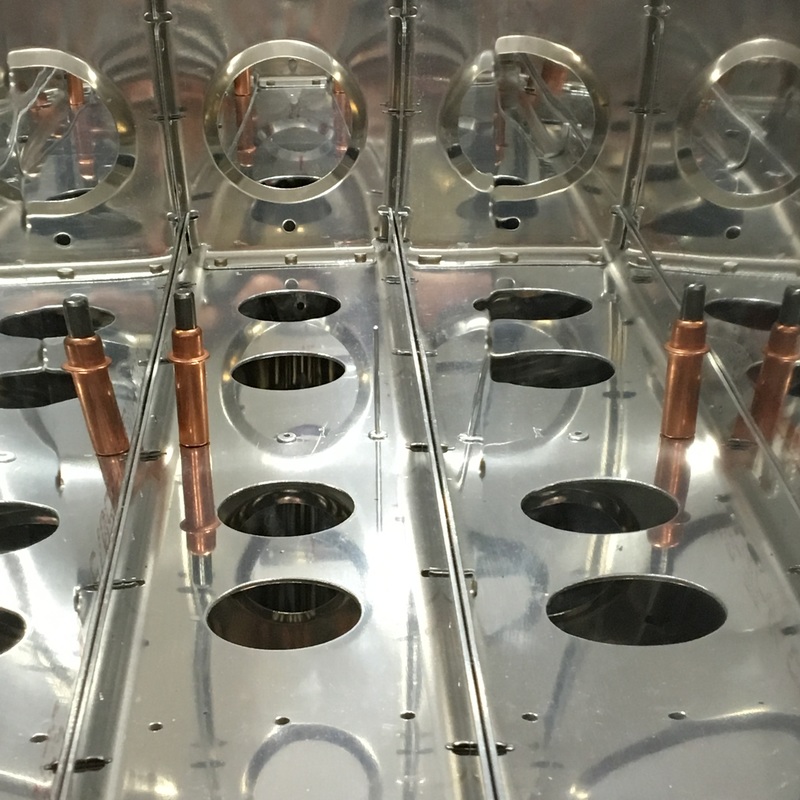
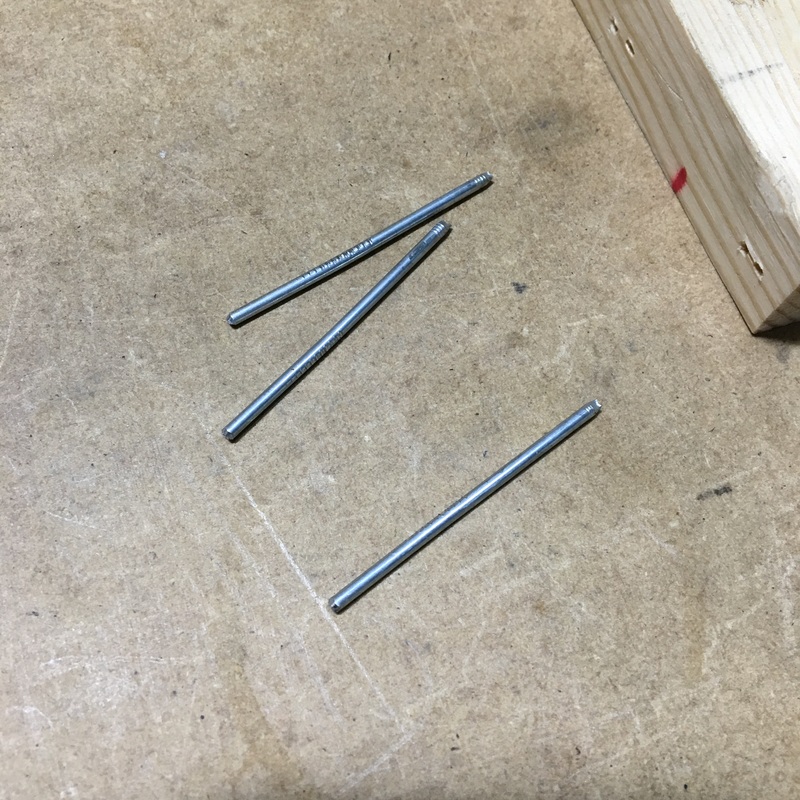
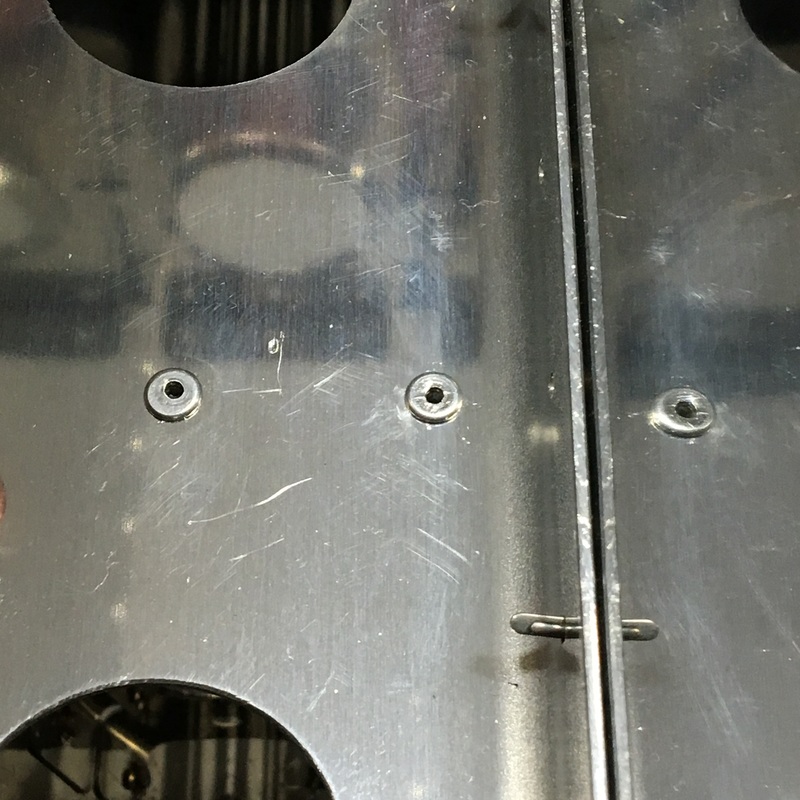
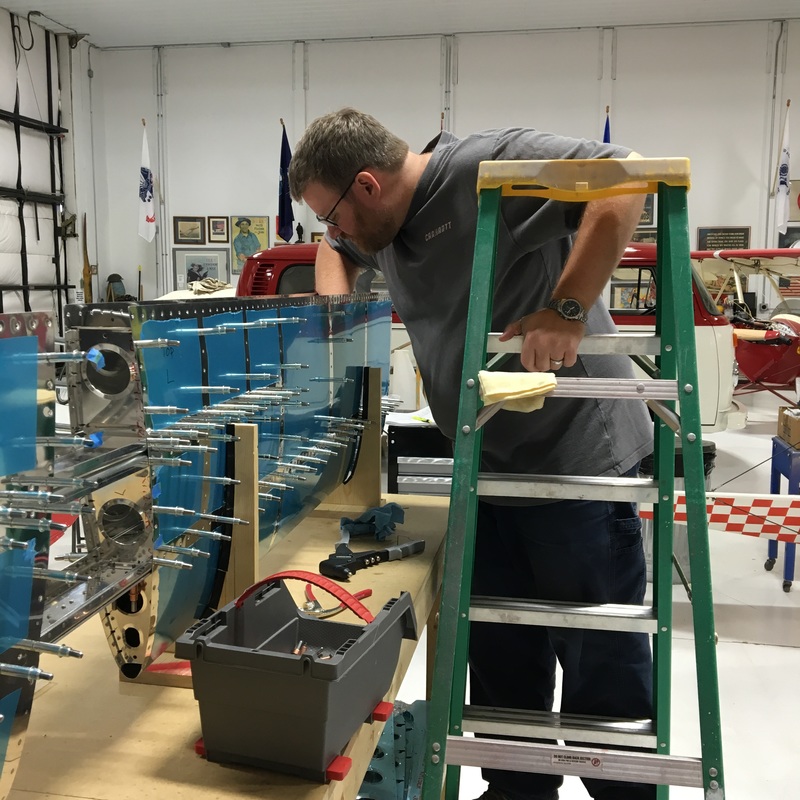
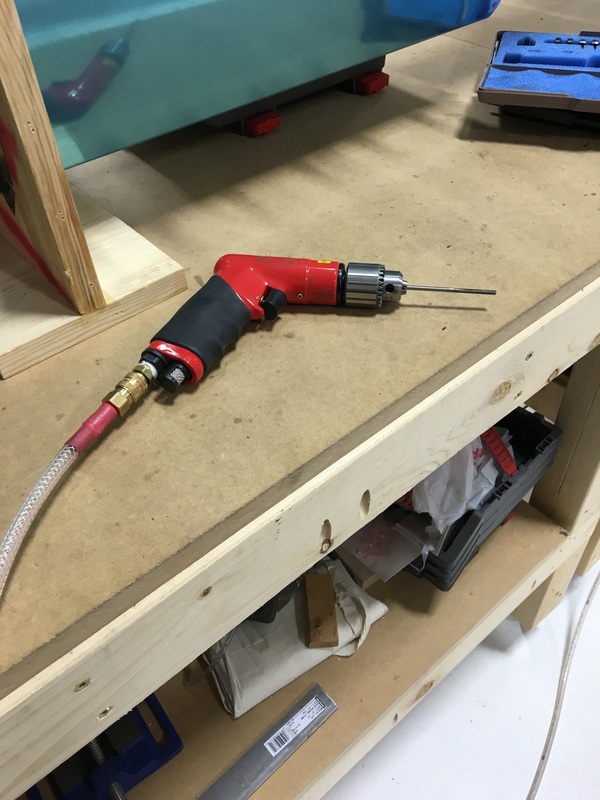
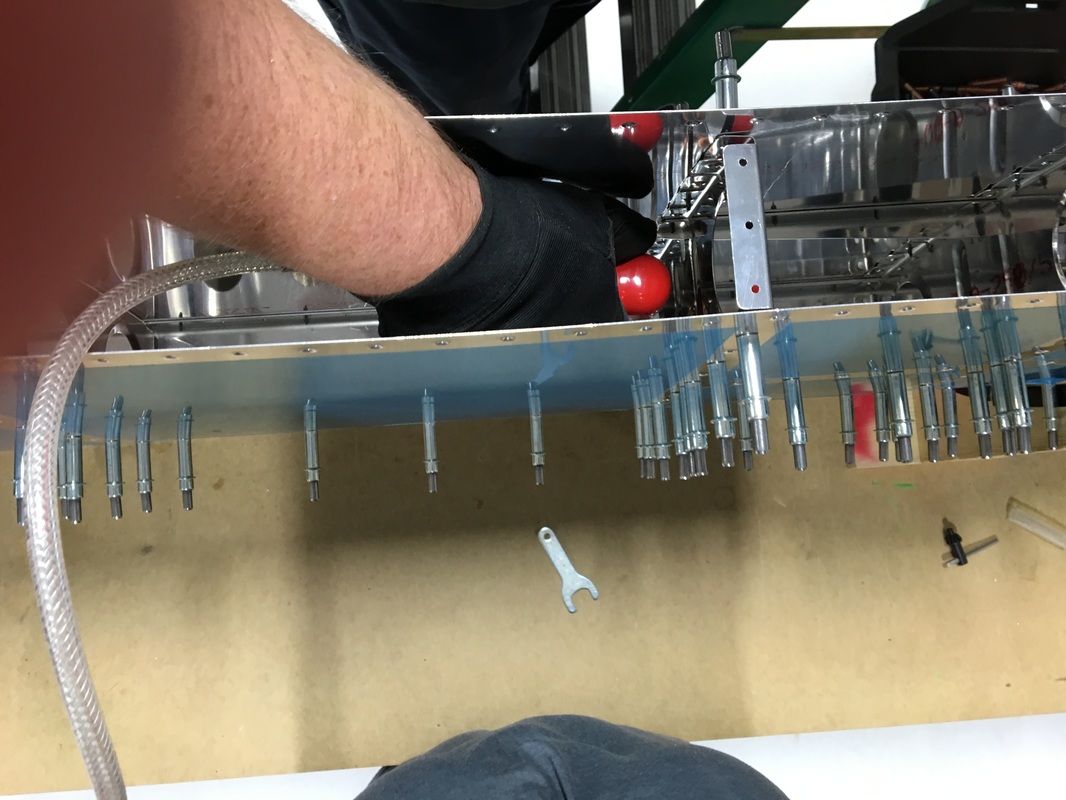
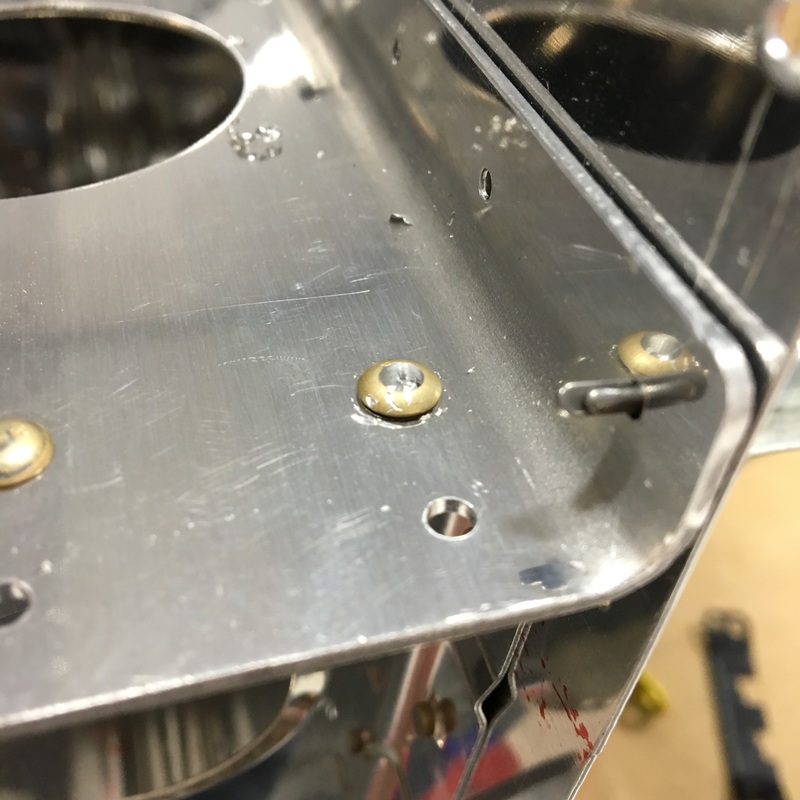
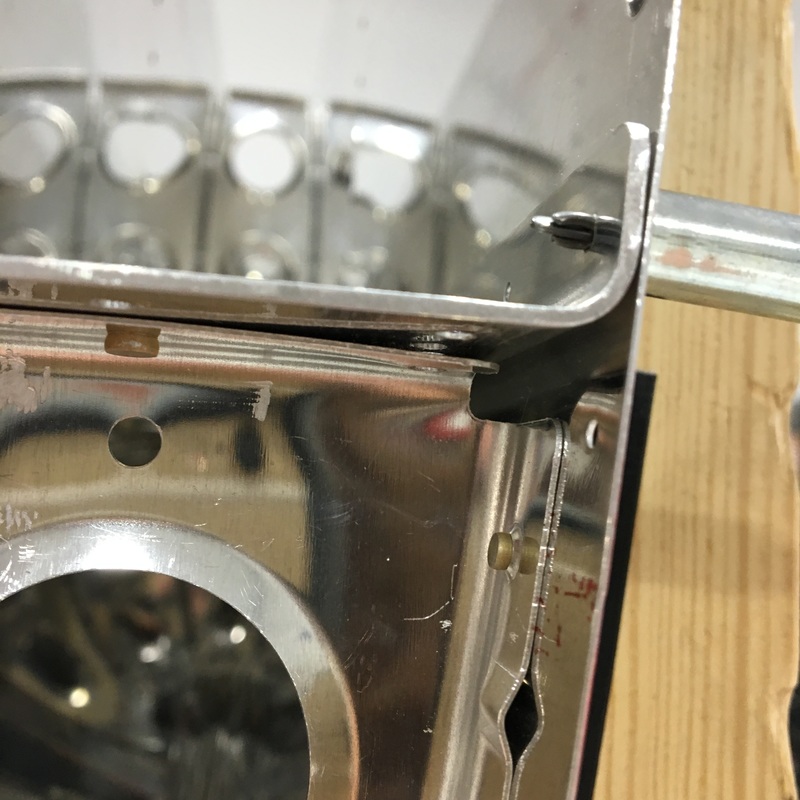
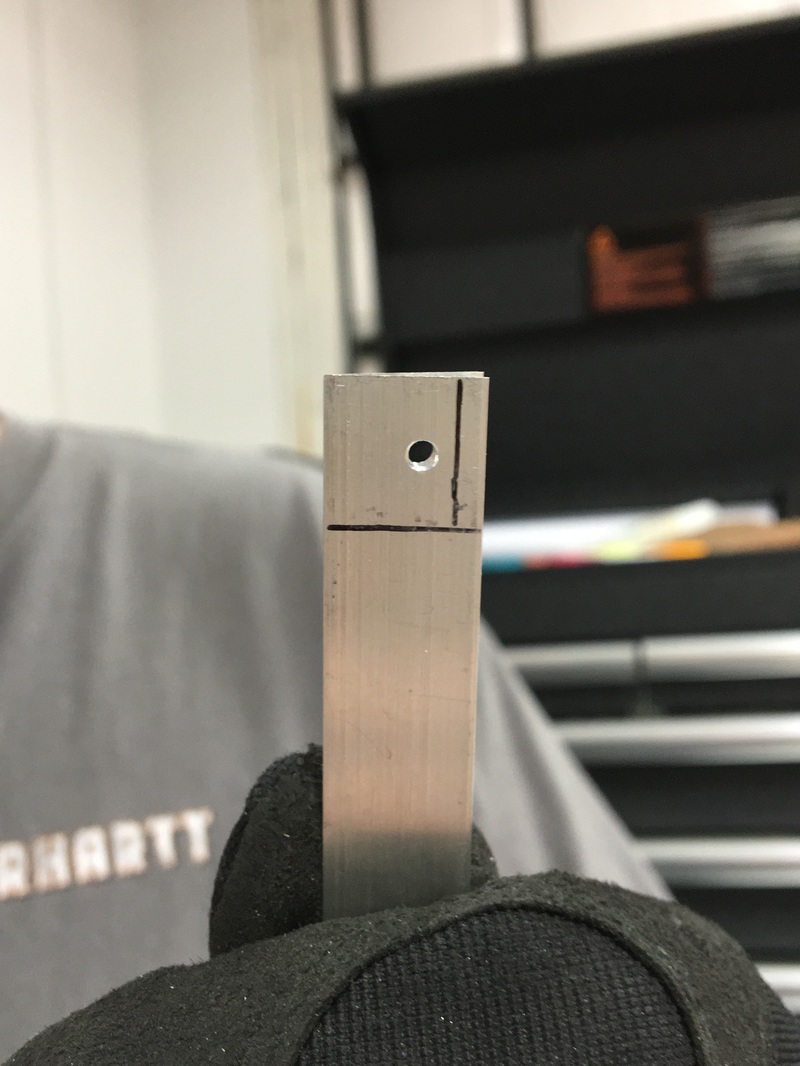
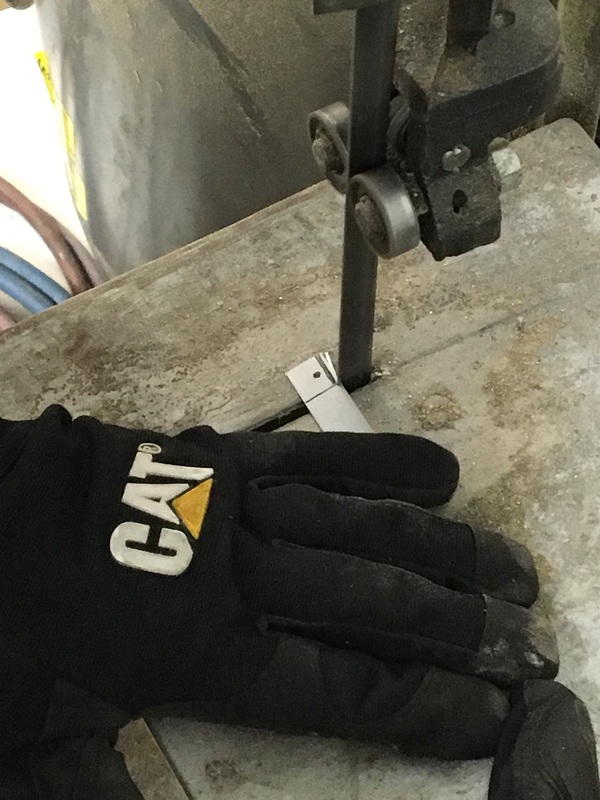
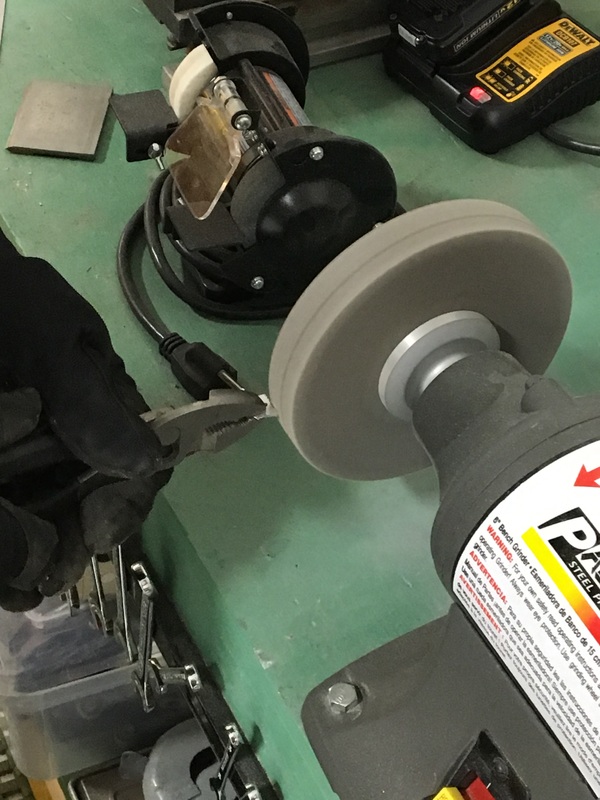
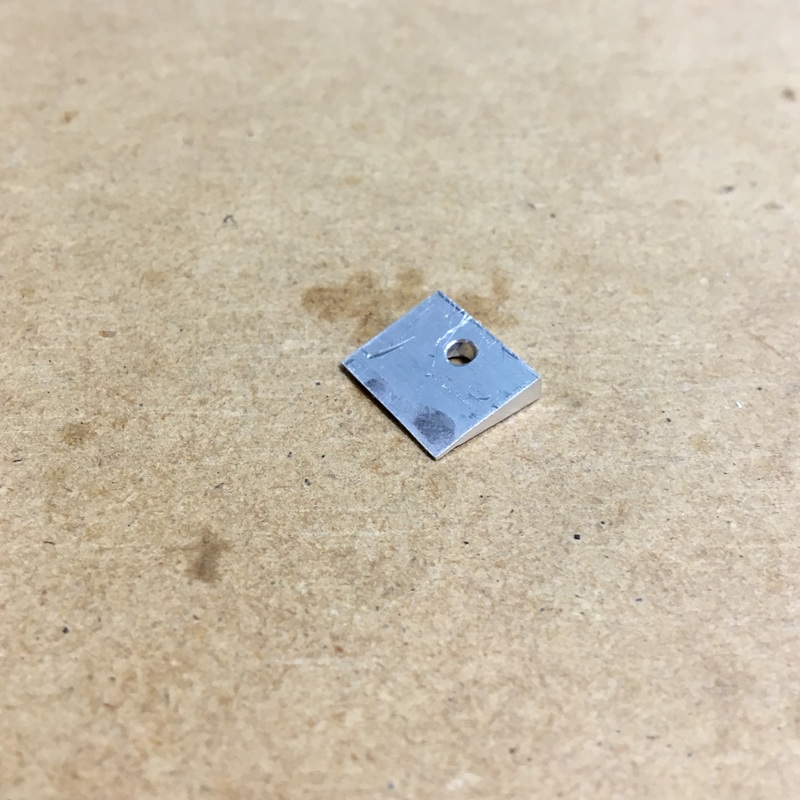
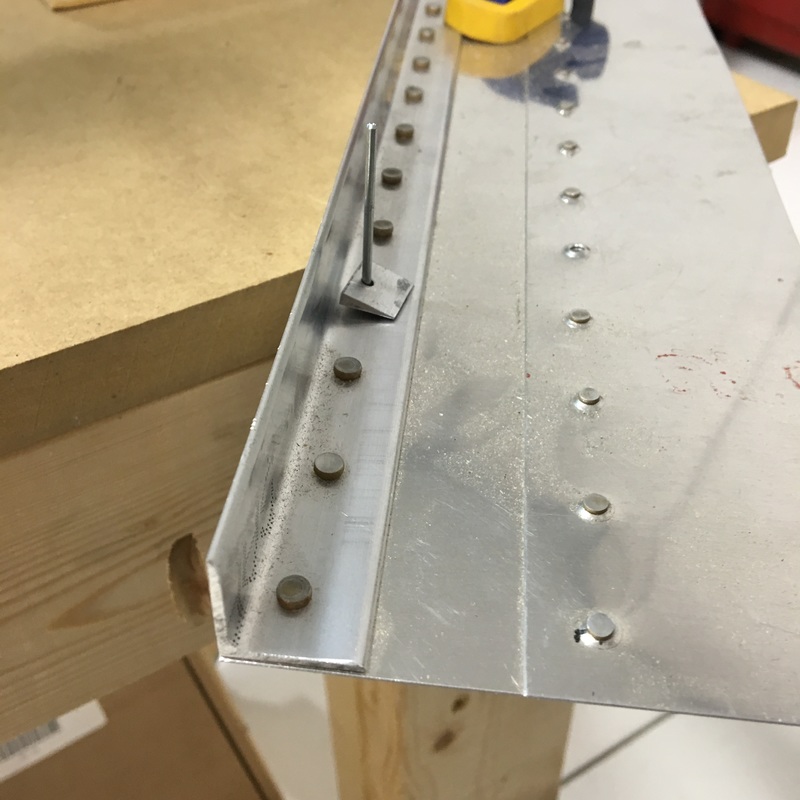
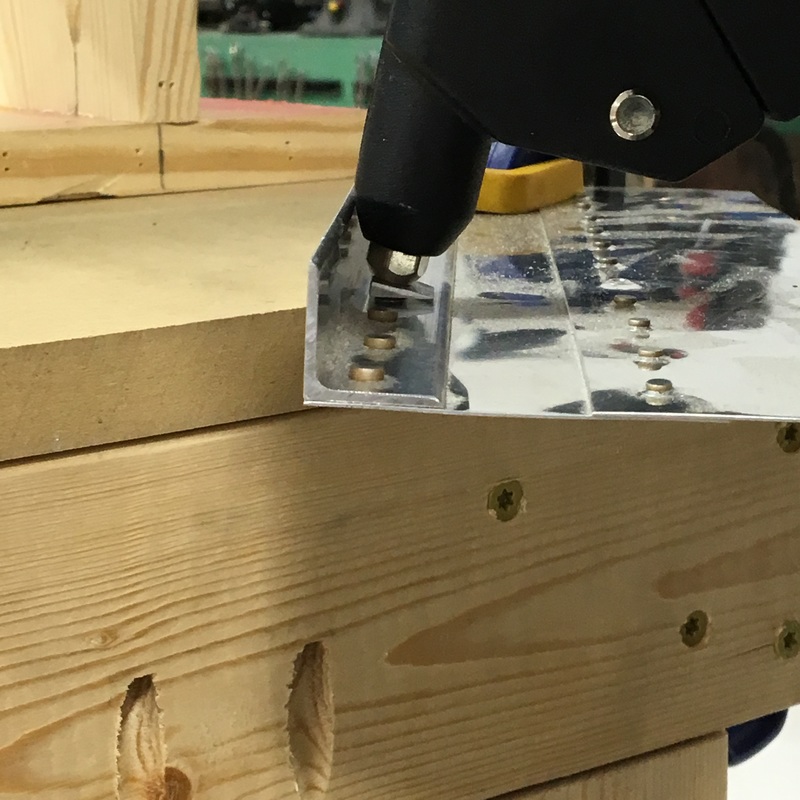
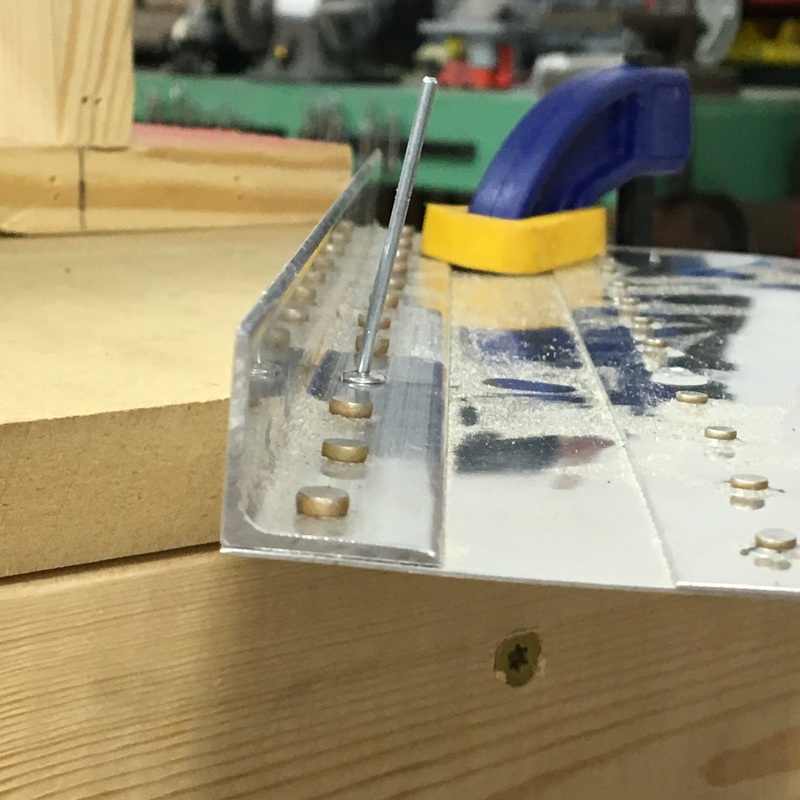
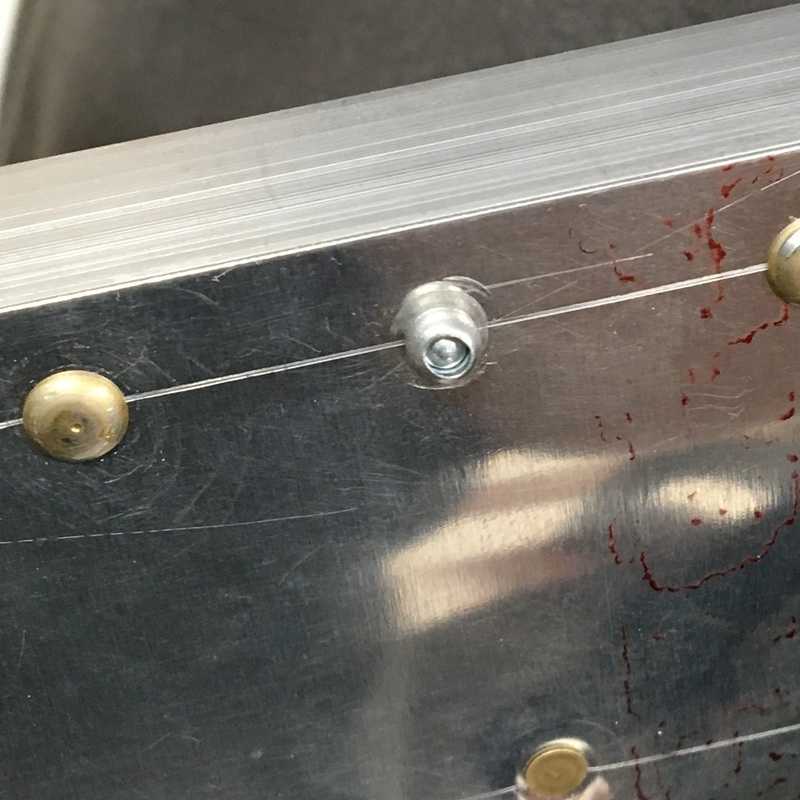
Now that the front spar is in place (with correctly sized countersinks) we have to attach it to the nose ribs we previously riveted into place. The problem is that once the spar is in place, the front of the horizontal stabilizer is completely closed off and inaccessible. We need to put rivets in to replace those copper colored clecos, but we can't squeeze or buck most of the rivets because we can't reach both sides. 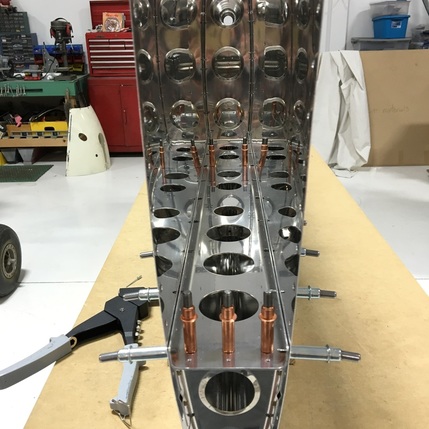 Instead, we will use pop rivets (also known as blind rivets or pull rivets) to attach the spar to the nose ribs. Pop rivets look like this. 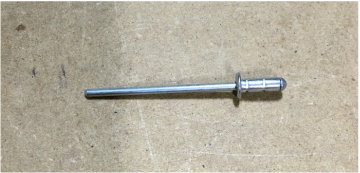 The fat end (on the right) is the portion of the rivet that will actually hold everything together. The long pin (on the left) breaks away once the rivet is in place. To use a pop rivet, you need a special tool (surprising, I know!). The wide end of the rivet is placed into the hole and the pin goes into the pop riveter. When the handles of the riveter are squeeze together, it compresses the rivet and breaks off the pin. Mike had to stand on a ladder to reach most of the rivets. Many of the holes needed to be reamed before we could install the rivets. We tried to use the regular hand drill with the angle drill attachment but there wasn't enough room. I couldn't get a decent picture of Mike trying to use the drill (darn my short stature) so I held the drill while Mike stood on the ladder and took a the picture. 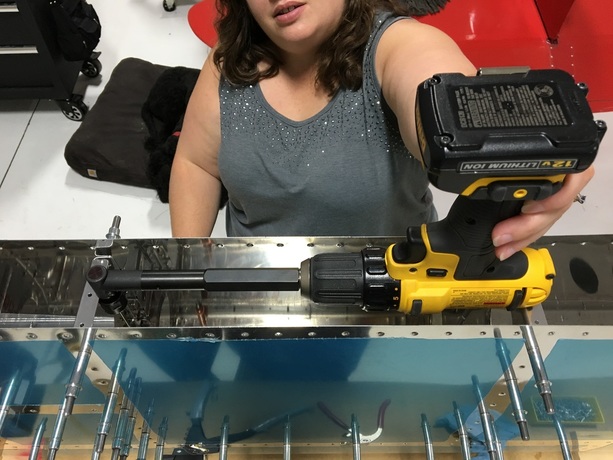 The air drill is quite a bit smaller, and was able to reach most of the holes without using the angle attachment. Installing all the rivets seemed liked a pretty straight forward job, but we did run into a few snags. Our first problem was due to poor decision making but was, thankfully, in an area that was easy to access. At the end of each spar, we were able to use regular rivets the rivet gun. I can't even remember exactly what happened here, but the rivet on the right obviously isn't seated properly. That gap between the head of the rivet and the spar is a bad thing. 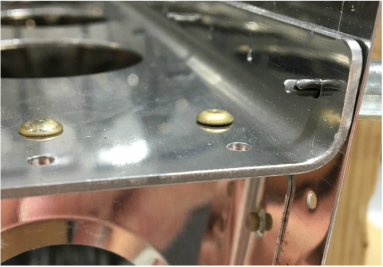 We had to remove the rivet and try again, but during that process the flange on the nose rib got bent. The obvious solution was to use a clamp to hold the spar and the flange together while we placed the rivet. The problem was that the clamp had to practically cover the rivet hole before the pieces were in the correct position. We decided to try the rubber hose trick that we used earlier, but this time with the bucking bar. 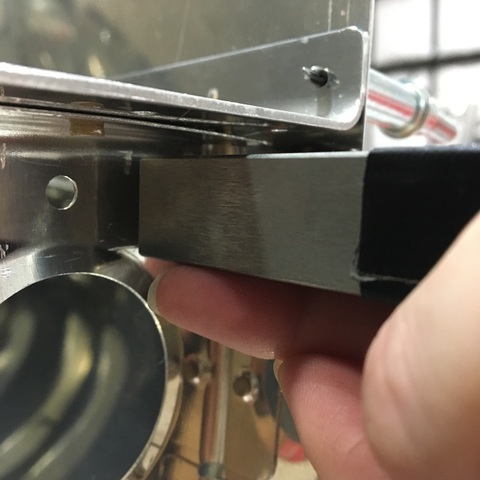 You can just barely see the tiny sliver of rubber hose between my bucking bar and the bent flange. The process worked fine, but as I look back on this whole process I have to wonder why were weren't using the squeeze riveter in the first place. Were we trying to make our lives harder? The second challenge we encountered was installing pop rivets when there wasn't enough physical space for the pop riveter. When the nose ribs and inspar ribs lined up, there was only about a quart of an inch between the pin of the rivet and the rib. There's no way the pop riveter is going to fit in there! 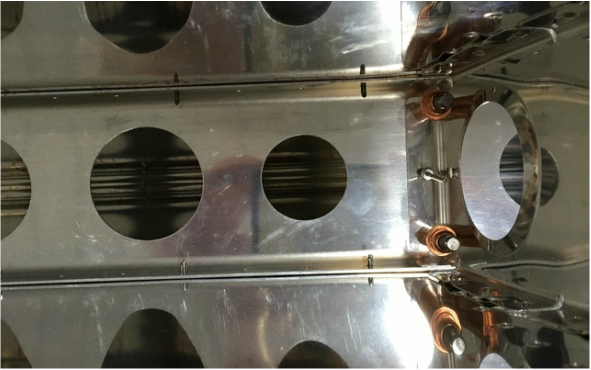 So...Mike fabricated a widget (the actual, technical term according to Mike) so we could get those rivets in place. The widget is really just a very tiny wedge with a hole drilled in the middle. 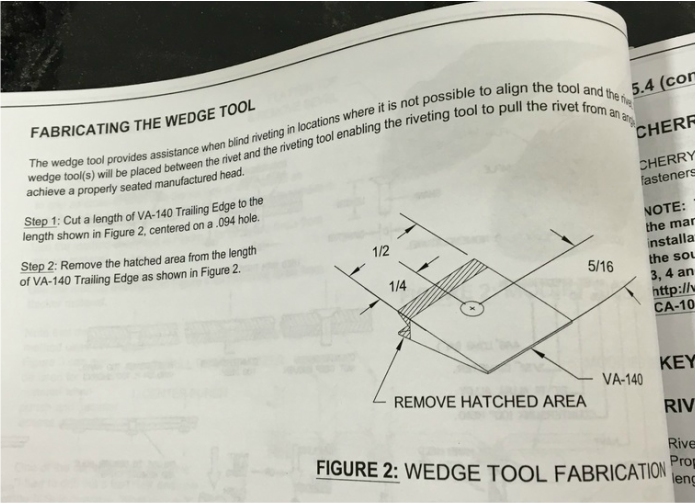 I'd like to point out that the whole wedge is only 1/2 inch wide. To make the wedge, you use trailing edge - a thin, wedge shaped piece of aluminum that we will be using elsewhere on the plane (I'm not going to say where we will be using it, because I honestly don't know at this point). Mike drilled, cut, and ground until we ended up with a beautiful, tiny wedge. The wedge allows us to use the pop riveter at an angle but still set the rivets in place correctly. The instruction manual has a nice set of diagrams that describe how it works. 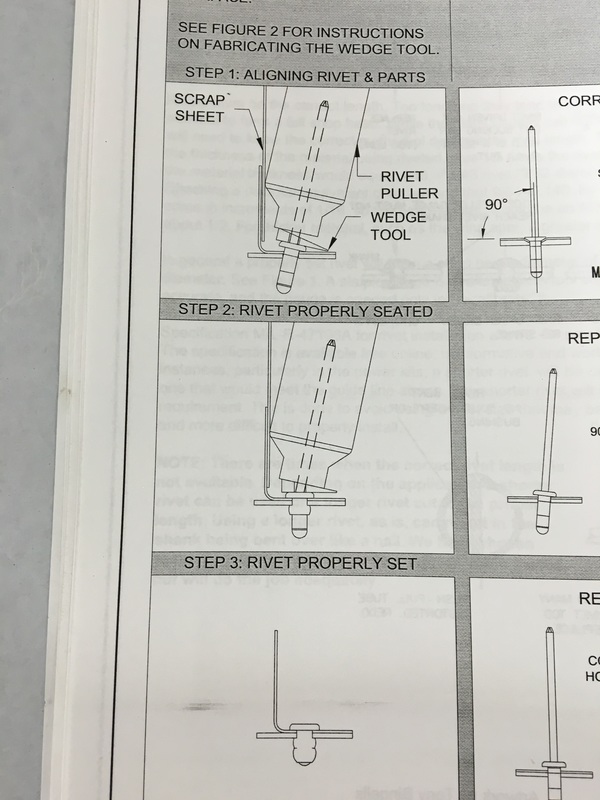 We were both a bit skeptical that the wedge was going to work, so we decided to test it on some scrap material first. We stopped half way through to make sure that the head of the rivet was flush and you can clearly see (bottom left) that the pin has been pulled at an angle (thanks to the wedge) but the head is properly seated against the metal. You can also wee what the shop head looks like in the bottom right picture. After our test, we were able to finish the rest of the pop rivets in a matter of minutes.
2 Comments
|
AuthorThe supportive spouse's guide to building an airplane. Archives
May 2017
Categories |


 RSS Feed
