|
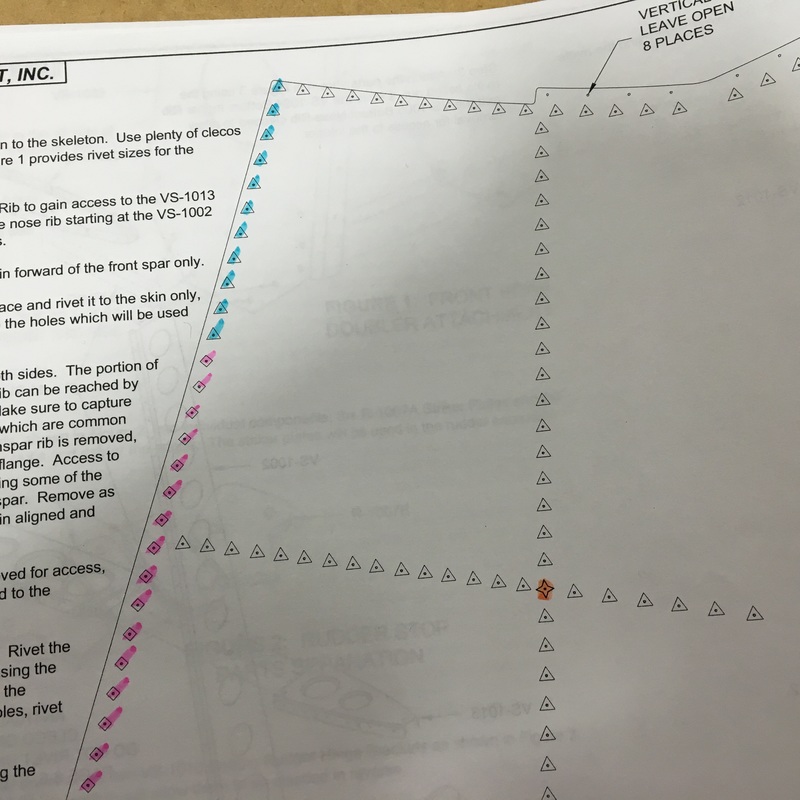
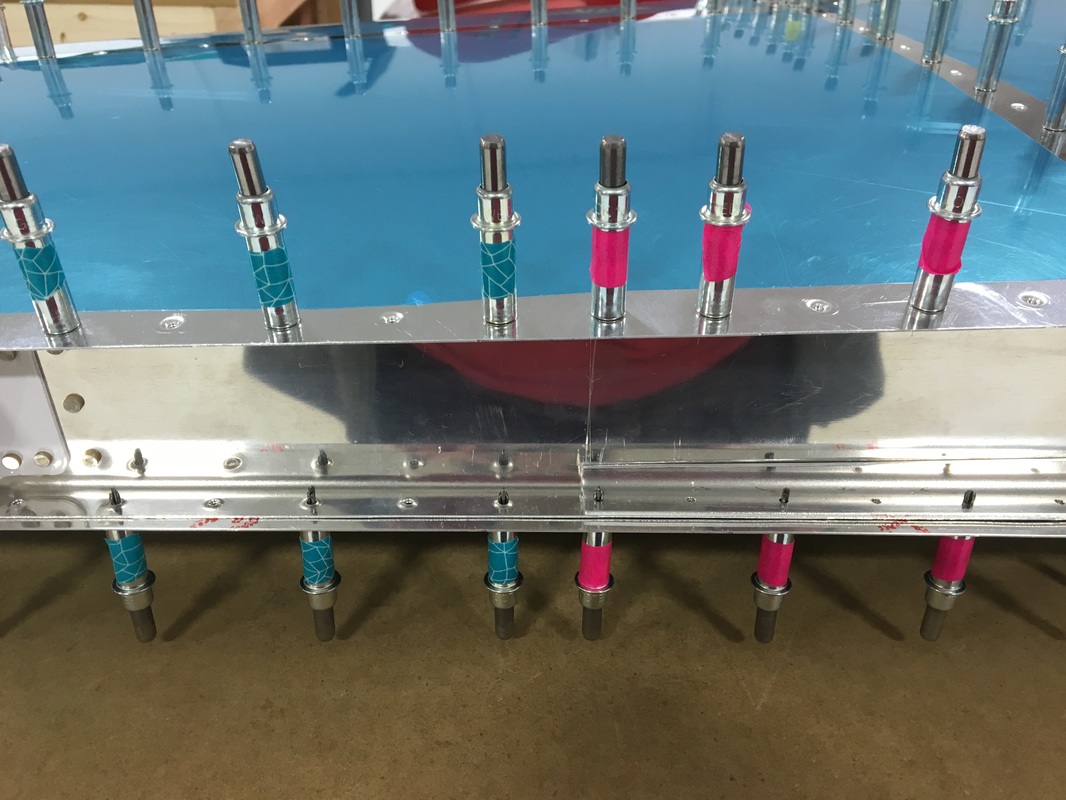
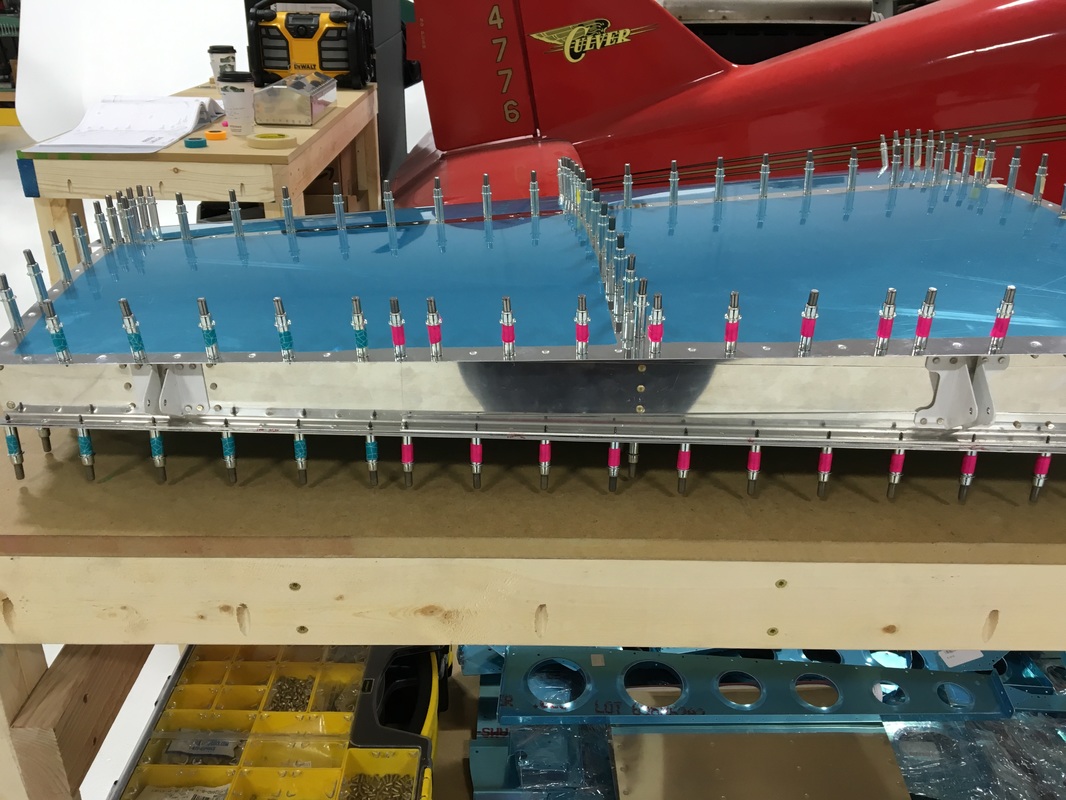
You may remember that we've had some trouble in the past with accidentally using the wrong size of rivet. That's because the directions for riveting look like this: 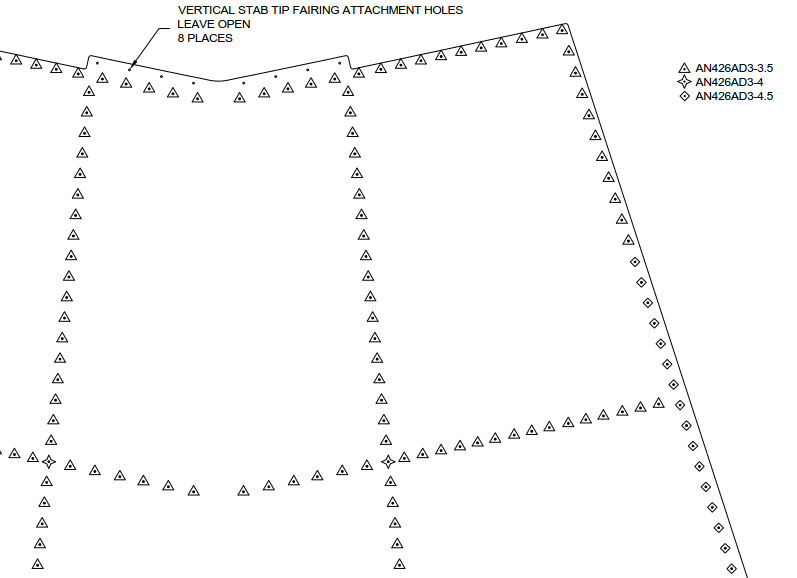 Be careful not to misread one of the symbols in the drawing, or one of the numbers in the rivet description, or miscount how many triangles there are before they turn into diamonds. I had an idea of how we could avoid a repeat of our last adventure with replacing rivets and it involved crafting supplies. Now, I'm not really a crafty kind of gal, but I have seen enough Pinterest posts shared on Facebook to know about washi tape. My bright idea was to buy matching sets of highlighters and washi tape and use that to keep us on track. We assigned a color to each shape on the drawing and then marked the corresponding cleco with the matching color of tape. It worked surprisingly well and made for some very colorful airplane pictures. Quite honestly we could have used a lot less tape and just color coded the first and last cleco for each size of rivet. But...I liked the way it looked and went a little crazy (maybe I'm a little more crafty than I want to admit). So, here are some gratuitous photos of taped clecos. In my last post, I mentioned that the instructions for this part of the build are very, very important. Here's why...the vertical stab is essentially a long, box and all six sides of that box are sealed. But wait, you may say, what about that row of clecos that runs down the center of the skin. How can you possibly put a rivet in those holes if all sides of the box are sealed? Hence, the importance of carefully following the instructions. At some point, some really experienced builder figured out exactly how to reach every single rivet hole and put all of that information in the instructions. Here's a sample: 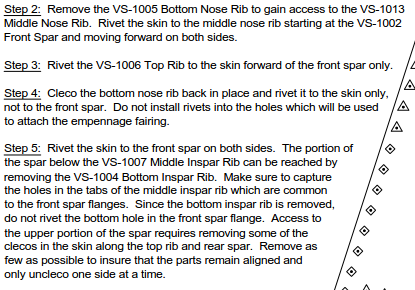 Clear as mud, right? Basically, you remove certain strategic pieces of the skeleton so you can reach different sections that you need to rivet. The rivet gun is the only way you can install these rivets because there's just absolutely no way to could get a rivet squeezer big enough to reach these middle rivets. (OK, I hope Mike doesn't read that last sentence because there probably is some sort of (really expensive) rivet squeezer that could do that job but I just really don't want to buy any more tools right now.) The first thing we got to do was out a piece (the bottom nose rib) so I could reach inside with the bucking bar.  I didn't measure the distance from the edge of the vertical stabilizer to those center rivets but I can tell you that my entire arm, all the way up to the shoulder, was inside that thing. I definitely had the harder job in this case because not only was I trying to fit my entire arm inside of that narrow hole, but I was also holding a heavy bucking bar in my hand. It is also really hard to get the bucking bar in the right place when you can't see what you're doing. We had a few missteps, but here are the first rivets that will actually be visible on the outside of the plane. 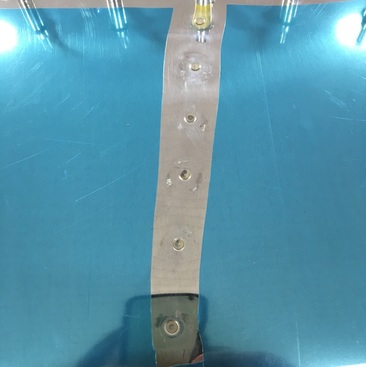 If you look closely, you'll see a divot around the second rivet from the top. That's where I thought I had my bucking bar in the right place, but was wrong. I also now realize why Rosie the Riveter was so buff, this is a great arm workout. Two hours later, we are about half way done. We still have to do the area in the upper left hand corner where you see all the clecos. That should be really interesting because the only way to access the center rivets in that section is to remove as few clecos as possible and stick your hand under the edge of the skin. Doesn't that sound like fun? 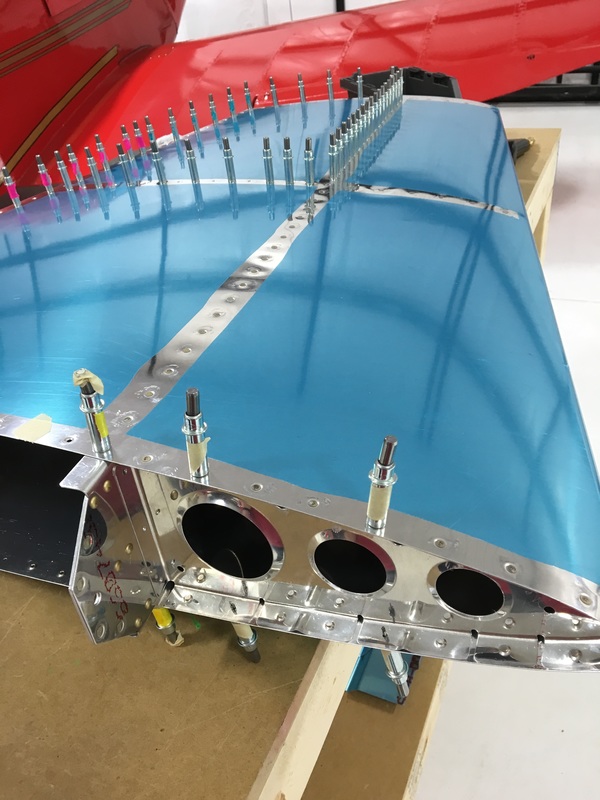
3 Comments
Man living in Europe
3/3/2016 11:19:31 am
I find it fascinating that you state you are not crafty. Isn't this a blog about you and your man 'crafting' an airplane? I think you get a crafty award with or without (washi?) tape. I fully agree it makes for great colorful pictures.
Barb
3/7/2016 10:46:57 am
I guess when I think of being crafty, I think of glue guns, glitter and bedazzling. I hadn't thought about our build in quite that way before. Leave a Reply. |
AuthorThe supportive spouse's guide to building an airplane. Archives
May 2017
Categories |

 RSS Feed
